Monday, August 22, 2011

Win A Free Download of My Memories Software !!!

GIVEAWAY HAS ENDED!


For your convenience all links open in a new tab
Its my very first give away, and I am SO EXCITED!
First off let me tell you about this awesome digital scrapbooking software that I have been playing around with for the past few days. If you know me, or have read my "about me" section, you would know that I am not a scrapbooker. I don't have the patience for it, and all the papers and embellishments would take up precious space in my fabric closet. HOWEVER (you saw that coming right?) I was given the opportunity to try out digital scrapbooking and I love it!  Oh great. Now I have another craft hobby!
So I downloaded the software, which was super easy, and got right into the simple to use, My Memories Suite program.
Ok. As a disclaimer, I have no idea what to do when it comes to scrapbooking, and I don't know the rules.... if there are any. With that in mind here is something I whipped up using the free papers, embellishments, and such that came with the software.  Don't judge too harshly. I'm a noob.
Here are a few pages from a small album I made with pictures from my 2009 annual Mother/ Daughter retreat. A getaway that my sisters, sis-in-law and mom take every fall. I never do anything with the pics and I think My Memories is perfect for organizing the fun times we have on these trips. 

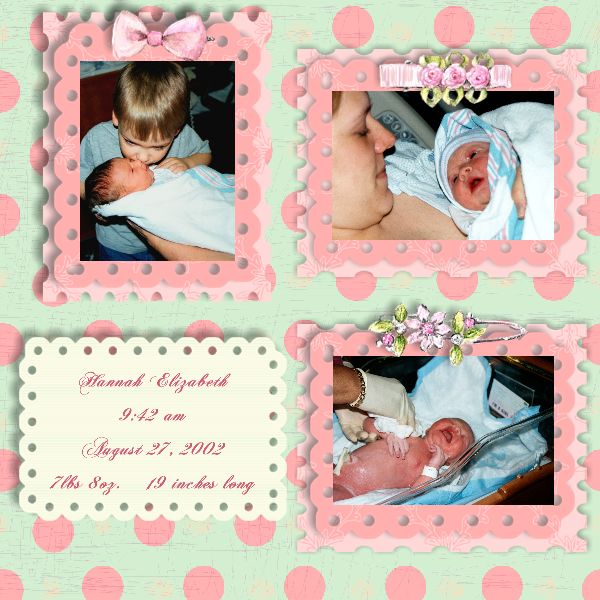
I probably should have done this first, but here is a pre-made template that was also available with the program. This sweet baby girl one was too cute.
 
Seriously... that child cried so much I decided I was done making babies.

The My Memories Suite software is much more than digital scrapbooking. You can make calendars, photo books, cards, you can add music, videos, web links, share it with friends and family... fun! You can buy different paper packs and pre-made templates and embellishments from them also.  I could play with it all day, but I really wanted to share this with you before a month passed by and I was still sitting in this chair playing. So I thought I would add this somewhat cheesy video to show you all the other wonderful things you can do.


Alright. Here is the SUPER EXCITING PART! My Memories is giving one of you lucky duck readers a free download of the My Memories Suite, Digital Scrapbooking Software. For freeeeeeeee (make sure you read that like Adam Sandler in Bedtime Stories. Go back and read it again if you didnt.. its makes it much more exciting). That's an almost $40 value.

How, you say, can I enter?
Please visit My Memories. Browse around, come back here and leave a comment telling me what digital scrapbooking kit you like.  This is a must. If you don't do this you don't get entered into the contest.
Want extra entries? Of course you do! I am going to give you several ways. Leave a comment that you did so for each of the following extra entries.


*Become a public follower of my blog. If you are already a follower, thank you, and just comment telling me so.
*Follow (or be a follower of ) my blog on Facebook .
*Tweet about this blog post.
*Follow My Memories blog
*Facebook,
* and Twitter.

 Be sure to leave a separate comment for each extra that you did so you have multiple entries.

This contest will end Monday, August 29th at midnight (EST). I will use Random.org to determine the winner. On Tuesday (30th) I will announce the winner.
Be sure you have an email address connected with your comments. If you use Blogger or Google, just be sure that your email address is enabled. I believe you can post with other types of accounts also, like Wordpress. You can always add it to the bottom of your comments like so-  fordjunkstuff (at) gmail (dot) com

For all of you un-lucky ducks, or those of you who don't want to enter the giveaway, but like what you see. My Memories has given me a coupon code to share with you. This coupon code provides a $10 discount on the purchase of the MyMemories Suite v2 scrapbook software. It also comes with a $10 coupon for downloads. (total value of $20!). They have a dollar section, so you could make that $10 stretch. I am all for that! This code is only good for My Memories Suite v2. It never expires so please use it, pass it on to friends and family, blog, Tweet and Facebook about it and have fun.  Here ya go!  Visit My Memories here and use this code - STMMMS97510



I was given my own free download of My Memories Suite, but my opinions are all my own... and I will give them too, don't ya know.


Friday, August 19, 2011

Photo Friday

Another astrophotography picture. This is from Fall 2009. I really do love astrophotography, but its hard to do here most of the year because of the humidity. Being outside at night in the cold is no fun either.
 I love taking a pictures of Earthshine. Thats light reflected off Earth onto the dark side of the moon (the grayish part you see in this moon pic). You dont always see it with the naked eye. Usually I just see the Crecent Moon shape, but with the camera it takes on a whole different look. I love it.


Wednesday, August 17, 2011

Necklace and Earring Rack From Scraps.

In my last post I told you how my husband and I made bathroom mirror frames using left over boards, from the contractors pack that I bought, for my dining room re-do. Well, my hubster was going to throw away several good size scraps and I rescued them. So glad I did because I decided they would be perfect for a project that I had been thinking of doing for a while now. A rack to hold my non-heirloom quality necklaces and hook earrings.
I started off with just the necklace rack and decided an earring rack would be great too. I found a long-ish board from the scraps that thankfully had straight, not mitered, ends. I had a pack of 100 brass cup hooks that I have had.. pretty much forever. What on earth? So I pre-drilled almost 50 teeny holes into the thick end of the board and screwed in the brass cup hooks. I spray painted it first, and added a second coat to cover the shiny brass cup hooks.
I did the same with the earring holder. I just used some small eye hooks that I had in an old picture hanging kit. I spaced them all about a forefinger width apart. If I did it again I would have spaced it maybe an inch apart instead. This works though.
 After the paint dried I screwed them into the wall. I marked the studs but they were in a weird place so I just used a stud for the center of the boards. For the necklace one I used a long screw in either end and just screwed right into the drywall. Its working quite well.
 I decided to hang them in my closet. There was a long wall without shelves and I figured it was a the perfect place for them.
Thats it. Super duper simple. Incredibly cheap because it was made from leftover parts and ancient hardware. The fun part was hanging up all of my necklaces and earrings.
Boy, most of these picture are pretty crappy.
 Of course I had to hang everything up in almost Rainbow order. Yay!

 Thanks for dropping by.


Linking up to:


Visit thecsiproject.com

Thursday, August 11, 2011

Framed Bathroom Mirrors

So, I told you in my dining room re-do how we bought a contractors pack of door frame molding. We used it instead of chair railing, and looks great. It was only $48 for the big pack and covered my dining room, my daughters room (I promise to post that re-do soon), and my bathroom mirrors. I still have a 12 foot board, and an 8 foot section left, quite a few feet worth of scraps.
Here is my guest bathroom mirror before the molding... you've seen this done elsewhere, no doubt.
The mirror really blended in with the wall.
Here it is after with the molding and some black spray paint.
Such a cheap fix, but what a difference!
My hubby cut the molding and I painted it and adhered it to the mirror. I used an adhesive by Dap called "Strong Stix". The nice thing about it is you dont have to hold it in place or tape it in place till it dries. It sticks right to the mirror as soon as you press the molding with the glue to it.
I had plenty to do my bathroom also. Now the mirror in there is between 8 and 9 feet long (eek) so I told my husband to cut two frames to visually break up all of that mirror. Here it is before.
Now the after!
I decided to spray paint the master bath a brown to match the cabinets. It looks SO SO much better! Now I want to get 2 new light fixtures in there.
Here are a few tips:
Be sure to paint the back side of your molding. Or at least the back half inch or more. You will be able to see the back edge in the mirror.
With that in mind, keep the glue to the outside edge of the molding. The part that is not going to be reflected in the mirror. :) That one I learned the hard way. DUH!

Ahhh the power of molding and spray paint.
 
 
Thanks for dropping by!


Saturday, August 6, 2011

China Hutch Turned Linen Closet

A few days ago, in my "organizing my tablecloths" post, I told you about the crappy piece of furniture I was painting.  Well I spent the entire day, and part of the next in the garage working on it. Boy was it hot too! Why do I choose to revamp big pieces of furniture in the middle of summer? Crazy? Yes, I agree. Here is what I was painting.
You may remember it from my dining room makeover. An ugly little thing isnt it. It was my moms, who gave it to my oldest sister, who gave it to my youngest sister, who didnt really want it. Uhh... thanks sisters. Mom said it was about 35 years old (said it was a piece of crap). Not an heirloom quality piece of furniture, for sure. The bottom doors and that middle panel between them are plastic that was very well painted to look like wood.
 See there?
Just a beat up, ugly piece of crap. It did a good enough job holding my china, but my dining room is only  10x10 and much too small for this thing. 
I think the only real pieces of wood are the molding around the top and bottom, and the support shelved. Needless to say, I didnt have any concerns about painting over all that fake wood and plastic. Actually I was scared of sanding it and getting lead poisoning, so I just used a rub on, liquid sander stuff. Seems to have worked. 
One day I decided that it would look great in my guest bathroom. I measured it out and it seemed like it would fit perfectly in this little  nook.
Since it was going in my (mostly) black and white bathroom I decided to paint it black. So I did, and here you go. The following pictures were taken with a different camera and settings. The diamonds on the wall aren't really that bold. Its more like the above picture.
My husband has some issues with it. He says he doesnt like the glass on it. Says you can see yourself in the reflection when you are "taking a deuce".. hahah.. a deuce...ummm ew! I said I didnt care because it was the guest bath. Use our own stinkin bathroom if you dont like it.
Lets get back to the pictures shall we? mkay
Pin It
 Convenient Bathroom Readers (I personally think reading on the toilet is disgusting), wet wipes, and extra potty paper are within easy reach.
What do you think? Do you love it? I do... I say that about all of my projects, but this is right up there with my burlap pegboard lovin it!
I have been collecting and gathering up glass containers for all the fun stuff in the hutch.
I tried to add some lavender scented water to that atomizer to act a s a room spray. Not too sure if its going to work or not. Either way it looks cool in here. 
The clock was hanging in my bathroom, but went so well in here that I moved it. 
I want to get a basket or something for those toilet paper rolls. I could hide them, but I think I like them out.
The mirrors in the hutch really brighten things up in there. The big mirror used to hang on the mirror over the sink, The one with the writing on it had a hook on it that I pulled off.
I might rearrange and add stuff, but I like it for now.
Oh this piece had brass handles and hinges. I never really realized it was a shiny brass at one time. Here are the pieces before. This is what I always remembered it looking like growing up.
And after I cleaned it up a bit. Just this little bit look a lot of elbow grease and that Brasso junk smells so bad! I decided that lots of people have payed big bucks for their knobs and pulls to look like antiqued brass, so I left it at this.
Looks good with the black paint. Oh, by the way, I used a Rustoleum Painters Touch latex in Flat Black. I was going to use a wipe on poly, but it had solidified and so I decided to use a beeswax, feed and wax goop that you rub on your wood to polish and protect it. Smelled like oranges. mmmm.
So now, dear readers, I part with one last picture. The ugly flooring just screams out at you now. If this were my forever house I would so rip that mess right up. If we had concrete floors I still might, but our house is on a crawl space. sigh.

Thanks for visiting.

Linking up to:

An Oregon Cottage (love this blog!)


Visit thecsiproject.com


Friday, August 5, 2011

Photo Friday

September 2009. Just some campfire smoke through the late morning trees. I thought it was pretty.


Wednesday, August 3, 2011

Organizing My Tablecloths

 I've been super busy the past few weeks trying to get projects done before we start school back up. My kids finished in February and I decided to take an extra long break so that I could do these things before they build up and overwhelm me. It didnt work. Now we really need to get school started soon and I am waiting until the last minute to do things. Classic I tell ya.
Right now I am working on painting a piece of crappy furniture. I am between coats so I thought I would share a nice little organization project I completed since on our long school break.
I got rid of my linen closet and turned it into a game and junk closet. The tablecloths and napkins and place mats were being stored in the pantry on the floor in a fabric zip bag. Very inconvenient. I decided to put everyones coats in their own closets (that's where the sheets went too) and hang up my table linens.
Here is what the coat closet looks like now (no before... but it would have been boring).
I hung up all of the table cloths, in rainbow order, on those thin, fuzzy hangers. The ones I got happened to have little hooks for stacking hangers together. I decided to take the plastic skirt/pant  hangers, that Kohls always leaves on my clothes, and use it for the napkins, placemats, table runners, and doilies. Yes. I said doilies. If I had napkins that matched a table cloth they got clipped to the skirt hanger and hung on the hook of the matching tablecloth. Like so:
An easy little organization project, but such a good idea.
Since we're here in the closet lets take a look at what else I did.
I hung an over the door hook rack in the closet for tote bags and a couple light jackets that were in there. I still need to make a place in the garage for those plastic bins on the floor of the closet. I did however organize that messy shelf you see. The one with the Hello Kitty on it.

See? I had these baskets  and thought they would work well. One is for hats and scarves, one for mittens and hand warmers the other is for my Stone Mountain gear. We visit there quite often and its just easier to grab the basket and head on out. It holds our passes, refillable cups, ponchos, and a couple of handwarmers in there too for when we go in the winter.  That shelf above them is for my husbands boxes. He loves to hang on to software and hardware boxes for the computer stuff.
Back to my painting. I cant wait to show you what I did!!!!

Linking up to:
Visit thecsiproject.com