Friday, December 30, 2011

Easy way to make pom-poms

I thought I would show you how I make pom-poms like the one I made for my recycled sweater hat.
First I cut a piece of yarn from the same yarn I want to make my pom-pom out of. Cut it about 6-8 inches long. Next slide it between your ring and middle finger like you are flossing your teeth. This will be used later to secure the pom-pom.
Next start wrapping the yarn around your fingers a million times or until it is very thick. Be careful not to wrap up the yarn you flossed your fingers with. A heavier weight yarn (thicker) will work up quicker and take less yarn than a light weight one.  The one I used for this tutorial is a bulky weight (#5) washable wool. It just depends on the look you like. I found that the thicker yarn gives it a fluffier appearance.
When your fingers are nicely cocooned in yarn, cut it from the skein/ball. Now take the two loose ends of your finger floss and bring them up to the top of  your fingers like so.
 Either get a willing person to tie it into a VERY tight knot for you, or gently slide it off of your fingers and tie it yourself. This is what you will end up with.
 Now take your scissors and start cutting the middle of the loops all the way around. This picture shows half of the loops cut.
On this pom-pom I chose to keep the 2 ends from the finger floss long so that I could use them to tie the finished pom-pom onto the top of my hat. You may need to trim up any longer than average ends on your pom-pom. If you don't need the tie just trim it to match the other strands of yarn.
Its really super quick and easy. I made a bunch the other night while watching Netflix. Made with my fingers they are about 3 inch sized pom-poms. Just use less fingers for smaller sizes. No need to buy a pom-pom maker!

Thursday, December 29, 2011

DIY Hat and Mittens From an Old Sweater

I have a pin on Pinterest from MarthaStewart.com. They used an old wool sweater and made mittens from it. I thought it was a great idea so last time I was in Goodwill I found a sweater that was half off and gave it a try. I am pretty sure the sweater was under $2. Here is a blurry picture of it.
 The Martha Stewart one tells you to wash the wool to felt it. Mine is cotton so that won't happen, which is fine with me. I decided to use the sleeves to make my mittens.  and to make them long to keep my wrists warm.
First I cut off the sleeve to a length an inch or so longer than I wanted the mitten.
 Then I cut out a mitten shape . I put my hand in the sleeve and cut around my fingers and thumb leaving about a half inch or so for a seam.

Next I used turned the pieces right sides together and used my sewing machine to stitch around the raw edges. I started with a zigzag stitch but I think a straight stitch works better. I decided to use my serger to finish off the edges but it will work just fine with just your sewing machine if you don't have a serger. Though I must say that I love my serger and think anyone who likes to sew should own one.
Sadly I didn't take many pictures of the mitten making process. I was in a hurry to make them and leave the house.  I did a little more cutting and sewing around the wrist on the thumb side to make it more fitted. Sorry.. this tutorial stinks, but you get the idea.
Here they are done.
 Pretty cool huh?
This next one you can see where I shaped the thumb side wrist part. It feels more snug now.
That done I decided that I would try to make a hat with the bottom edge of the sweater. I cut off a chunk from the bottom and used my husbands hat as a guide for cutting it out.
As with the mittens I just serged around the raw edges, wrong sides together. I also sewed a ... I guess its a dart in the top. Like the store bought one in the picture above has.  Here is what it looks like from the inside. It just gives it a more rounded appearance.
The "darts" are the bumps at the top and bottom and the left and right are the seams from where I sewed the 2 halves together. Does that make sense to anyone but me?

I made a pom-pom for the top and here is the finished hat.
 I have a huge head for a girl so I don't think it looks all that grand on me, but its a pretty cute hat.
The sweater I bought was a ladies small and here is all the sweater I have left.
You could make hats and mittens for the whole family with a giant mans sweater! ... And a wreath and pillows!
Yay for upcycling!

Friday, December 23, 2011

Homemade Hot Cocoa

I did it. I made my own hot cocoa. Its so ridiculously easy! Why didn't I do this before?  Its cheaper. OK so I didn't do the math, but it has to be. If it isn't at least its better for you which is priceless right? So. It's cheaper, better for you and better tasting than the envelope crap. I happened to use mostly organic ingredients so that is a plus for me.
Here is what you need.
 Plus salt and cayenne which I didn't photograph.
You don't have to use organic ingredients, of course. I just try to whenever possible because I know its better for us.

Homemade (mostly Organic) Hot Cocoa Mix:

1 1/2 cups of organic sugar (2 cups if you like it sweeter. I don't like a lot of sugar)
2 cups organic cocoa powder 
1 TBSP good cinnamon
2 dashes of sea salt (scant 1/8 tsp)
optional:
2 small dashes of cayenne pepper

Just mix all ingredients together then add 1 super heaping soup spoon (is that right? The big one in your flatware set? I just call it a shovel.) to your hot milk or if you prefer, water. I suggest milk. I use Publix brand organic milk.
 Stir thoroughly and enjoy!
Its always better in a favorite mug. I used to have a thing for flamingos when I was a teen and this cup is from that flamingo obsessed time period. I still smile whenever I see them.
One thing I did was to use my food processor to pulverize the sugar. Since I use organic sugar its darker and the granules are larger than normal white sugar. So to make it melt faster in the hot milk and keep it from sinking to the bottom of the dry mix, I ran the sugar in the food processor with the blade attachment for a minute or so.  I am not really sure what to do if  you don't have a food processor. Sorry. (update: duh! Use powdered sugar. drrrrr!)

See the difference?  The one on the right is the pulverized sugar.

 I  just used my food processor to mix in the rest of the ingredients since it was already dirty.  You can just stir it all together or put it in a jar and shake if you don't have a food processor.

Penzey's Spices has some awesome cinnamon that I used. If you are reading this and decide you don't want to make your own cocoa mix Penzey's has the most amazing hot cocoa mix ever with most of the same ingredients as this mix. I used the same type, Ceylon cinnamon, that they used in the mix that I bought last month.  There are no preservatives, dairy, or "what is that" ingredients.

By the way, here is the ingredient list from Nestle Rich Hot Chocolate Mix -Sugar, Corn Syrup Solids, Partially Hydrogenated Coconut or Palm Kernal Oil, Hydrogenated Soybean Oil, Dairy Product Solids (From Milk), Cocoa (Processed with Alkali), Calcium Carbonate, Contains Less Than 2% of:, Salt, Cellulose Gum, Sodium Caseinate, Dipotassium Phosphate, Sodium Citrate, Guar Gum, Skim Milk, Sodium Aluminosilicate, Mono and Diglycerides, Artificial Flavors, Sucralose

Why must it have all that crap in it? Seriously. Make your own.

   
 Store in an airtight container. I got this one for $5 at Publix last year. A mason jar would have worked too, but this was my hot chocolate pack container and I love it.
Hope you give this a try and enjoy your homemade hot cocoa!
Thanks for reading.

Monday, December 19, 2011

Negative Covered Lamp

Several years ago I saw this awesome project online and fell in love with it. I have wanted to do it for so long and I finally did!
It's just an IKEA GRONO lamp with negatives Mod Podged all over it. Super simple. If you need a tutorial, Poopscape Projects (am I the only one that giggled over that name?) is where I got the idea. I really love the look of B&W negatives, but I only had one set and couldn't find them. Plus they were of my son as a baby, and negatives of people are rather creepy..... especially babies. You see some people in the lamp I made, but I tried to stick to landscape or objects. Like these from Yellowstone.
 The only tip I have is to bend your negatives at the corners before you Mod Podge them on. I laid them out in the order that I wanted them, bent for the corners and then MP'ed them. I chose to stagger them so the seams between each negative (photo) were not lined up. I also had to overlap some of the top and bottom seams to cover all of the lamp. That's it. See? So simple.
I would love to make another one with slides! How fun would that be?!?!?!


Friday, December 16, 2011

Photo Friday

Oh crapmas tree, Oh crapmas tree.....


Wednesday, December 14, 2011

Homemade Christmas Ornaments

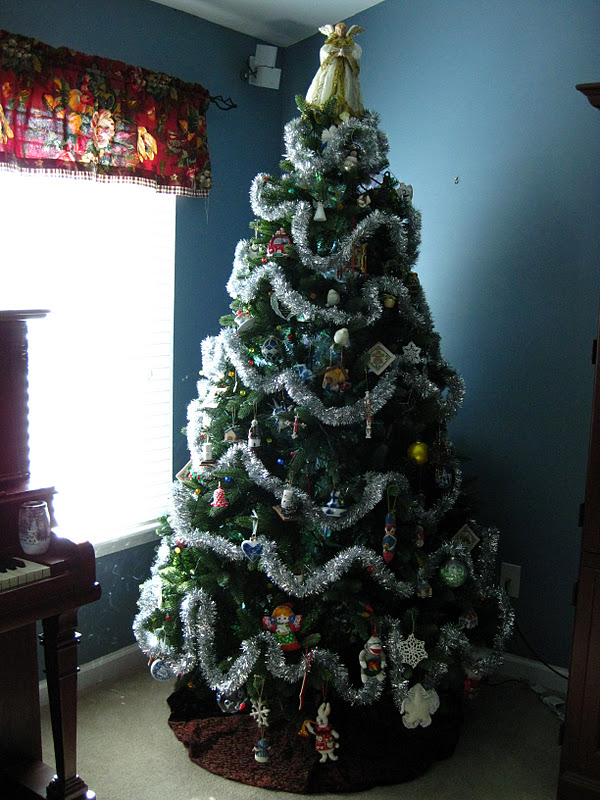
I have been working on my Pinterest crafty boards making things that I have pinned. Lately its been ornaments. I have a few to show you today.
Last week we had our annual ladies ornament exchange at our church. We do it Yankee swap (Chinese Gift Exchange, Dirty Santa, Thieving Secret Santa, Parcel Pass, Christmas Swamp Thing, or Pollyanna) style. Usually my homemade ornaments aren't too popular, but this year it actually got "stolen" as many times as it could before being "frozen". It made me happy. Here is the ornament I made.
 
I always wanted to try quilling so I googled quilled snowflakes and found a site that had snowflakes and patterns you could buy to show you how to make a quilled snowflake in a glass ornament. I wasn't willing to pay the money for it so I thought I would try it out myself. I just read up on the basics of quilling and did my own design. I used some medical forceps (long gripping type, scissor handled like tools) and tacky glue and constructed it like a ship in a bottle.
You probably can't tell from the picture, but it is not a round ball, its one of those disk type ornaments.
This pic is the ornament held up to a lampshade. 
Once it was all dry I added some iridescent "snow" and tied a double sided ribbon and loop to hang it to the top.
It is very simple, but time consuming. This is my first quilled project. You can buy quilling paper that is pre-cut and tools for rolling the paper, but I used printer paper that I cut (not as perfect as the store stuff) and used my free tools, that God gave me, to roll the paper (fingers). I added a "crystal" to the middle of it also. You cant really tell from the photos. It gives it a little extra bling.

Here is another ornament I made just because I thought she was cute.
A felt and embroidery Matryoshka doll ornament. I got the directions and inspiration from My Sparkle blog. Hers is much cuter.. I think mine looks a bit like one of those Pai Dong Long Neck People. Still, I love her. Doesn't she have a sweet face?

Yesterday I was in Old Navy and passed by the huge impulse buy items in the checkout lanes. I impulsively decided that my daughter needed a pink, glitter water bracelet and my son needed a six pack of press and go mustaches. He was like.. "What do I need those for!". I replied to be cool and that I would wear one too. So I did.
When I was done playing I got an ah-ha moment. I decided that it would be perfect for sort of recreating a little ornament I had pinned on Pinterest. Here it is. I think it quite hilarious.
                                                                                       Source: wanelo.com via Elizabeth on Pinterest


Here is my version. My husband pointed out that they misspelled staching so I made sure to do it right on mine.
 It took me too many tries to write the wording with a paint pen. My print is awful, and this was a "good" one. I was going to use my Cricut but I let a friend borrow it. I may still re-do it, but for now it works. I used a disk ornament filled, once again, with "snow". I tell ya, that little bag had more "snow" in it than the whole state of Georgia gets in a year.. maybe two.  Next I tied it off with a cute ribbon scrap I had been saving hoarding for many many years.
And thats all!
Made any cute ornaments lately? Do share! I always need inspiration.


Linking to:

Visit thecsiproject.com

Christmas Canvas Redemption

First of all let me say how excited I am. I just reached 50 followers!!! I never expected to get any, let alone 50.  Thank you all!
So, I had the "bright" idea of taking the calendar pages from my daughters My Little Pony calendar and turning it into cheap artwork for her bedroom wall. The calendar was only a buck last year so the pages are made out of recycled toilet paper.. or something. They are that thin. I thought I would Mod Podge a few onto some 12x12 canvas like I did with my family photos. It didn't turn out so well.
So now I had 2 canvases that were ruined with these ugly ponies on them.
The other day I saw a Facebook post from Mod Podge Rocks (love that blog!), where a blogger took a canvas and made it into a Christmassy scene with scrapbook paper. Here it is.


I pinned it on Pinterest. By the way if you are not on Pinterest you should be. If you are, you should follow me and I should be following you.
Follow Me on Pinterest

Isn't it adorable? I figured I could do this and hopefully redeem my ugly canvases. I had just happened to buy a Christmas paper pack from Hobby Lobby (50% off).  Here is the worst of the 2 ruined canvases that I used for this project. I tried to peel the page off and that didn't turn out so well either.
I used a paper for the background, unlike the inspiration picture, for obvious reasons. Still, if I had started with a blank canvas I would still use a background paper. I like the look. I used that light green one with snowflakes.
Here is my version. (click on inspiration pic link for directions if you need them)
 I love it! You can still see some of the wrinkles from the pony pic underneath, but its not so bad.
For the tree trunks I used a paper coffee cup sleeve I happened to have. Ric-rack was used for the ground/snow. I Mod Podged and/or glued everything down.
For the tops of the trees I decided to use some "crystal" snowflake stickers I had bought the same time as the paper. Also half off !
Ever go just a step too far in your crafting? I do all the time. I added some ribbon braiding to the side of the canvas and may have gone too far. Maybe not. Christmas  is one time of the year where you can get tacky.
hmmm.  Did I redeem the ruined canvas? I am happy with it.
Thanks for looking.


Saturday, December 10, 2011

Sparkly Bright Christmas Tree

I just wanted to give an easy tip for making your Christmas tree sparkly bright. Now I am one who loves for my Christmas tree to be a light source. Meaning I like to have it so bright that no other lights are needed in the room (unless you are reading or knitting..). I cover my tree with so many lights that it looks hideous unless its light up.  Really. Wires everywhere.
Ok. Well maybe its not as bad from a distance, but you have to agree, its much better lit up.
Here she is a few years ago.
I love the LED lights. My tree is pre-lit mostly. Since some strands are burnt out but I added several strands of LED. They really brighten up the tree.
One simple trick I use to make my tree extra sparkly is this: Iridescent cellophane. Seriously. Cut it up into ....oh lets say 12x12 squares or so and shove it into the tree around the pole in the middle. Also in spots that look a little sparse. 
 My incredible sis-in-law taught me this trick, and since she doesn't blog I thought I would share it with you. When people comment on how bright my tree is (hope that's a good thing..hmm) I always point out the cellophane. They never notice it by itself and have to look closely to see it. It really makes the tree glow from within. I suppose you could use a green color too, but the iridescent just reflects all of the colors. I think it makes the tree prettier during the times that it isn't lit up.

 
  See it? I got my roll of cellophane at Michaels, probably 10 years or more ago. I have been using the same squares every Christmas since.
And now, since I don't want to do a whole post on it, I thought I would show you the outside of my house all lit up. I "invested" in all LED lights for the outside this year. Some of them I got on sale last year after Christmas.
I am loving the brilliant light these LED put out.

Here is my tree from the outside-
Do you have any tips for making your tree extra sparkly and bright?