OH HOW I AM IN LOVE!!!!!!
So mine is a little different than hers. I dont know what size wreath she used, but mine was huge. About 16 inches across. She used one of those green foam wreath forms that have a curve to the top and she spray painted it. I didn't want to have to worry about seeing the wreath through any gaps, so I just hot glued some pages to it. You can use hot glue, but use a low setting so you don't melt the wreath. I got some special foam glue sticks, but I honestly don't think it was any different than regular glue.
Now I am not a big fan of taking a book and destroying it. I was taught that books are our friends (thanks Mom). However this wreath was much more exciting than it would have been if I had read it. I suggest getting crappy worn out Readers Digest condensed books. I have a use for the cover too which I will post about when I eventually make it.
I used 1 1/2 books on mine, but if you use a smaller wreath form you should only need one book. Library sales, garage sales, and Goodwill have plenty of these RD books, and should cost under a buck. Mine was free.
After my wreath form was covered I set off on the journey of paper rose making. I did this several nights while watching movies. Tear out, or cut with a box cutter, all of your book pages. Using 3 pages at a time, cut into a spiral shape, leaving a small circle in the middle. It doesn't have to be perfect, and after several dozen of these you will be a pro.
Start at the end and roll away until you get to the middle. I had a nice little system going. I cut out all my spirals, then I rolled them, then glued them to hold the shape.
The circle at the end of your spiral makes a nice spot for a blob of glue to hold it all together.
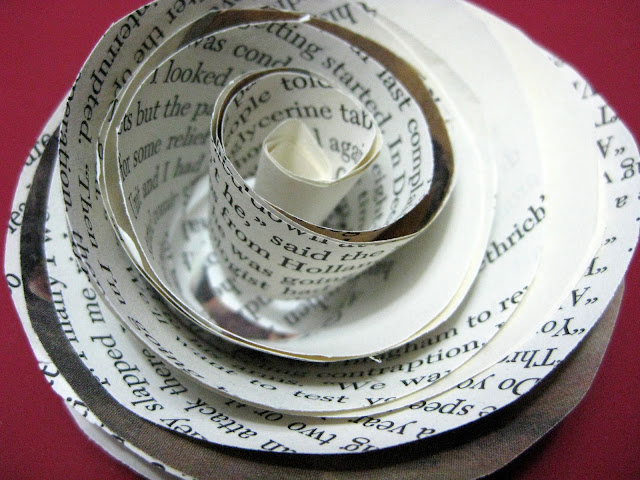
Here is a completed rose. I used some of the pages that had pictures on them. I like how it gave it some character.
Some of the pages I cut in half and made 2 spirals per page. I liked the idea of having 2 different shapes.
I sort of randomly glued them on. I didnt want the roses to look like little soldiers all lined up perfectly. I even tilted some on their sides to give it more dimension.
This rose on the bottom right is my absolute favorite one. Its a little hard to tell, but you can see the gold gilt edges from the top of the book on it. I am not sure how I did it, but I think its the only one like it on the wreath.
I decided to hang the finished product on my bookshelves. An appropriate place I think. I just happened to have a hole in the wall near where I wanted to hang it, so I screwed a cup hook in it.
The ribbon is a big piece I saved from a present, and its not really what I want for it, but it works until I can find the perfect ribbon. I just looped it through the wreath and knotted it then slipped it on the cup hook. Works perfectly.
I took quite a few pics, so you get to see them all... well a few of them.
Sigh.... I love it almost as much as my 600+ books
Linking up to:


3 comments:
Goodness, this is wonderful! Totally love it - one of the nicest I've seen, and I'm definitely putting the link for this tutorial on my main blog. Thanks so much for visiting me and leaving a comment or I'd never have found you. And how nice I can finally leave comments again, myself!
Hugs from the UK.
I love your link! Thank you so much for showing all of us how to do that paper rose wreath. I've always wanted to know how to do this, so thank you!!
sharon reed
Nice work! I know what you mean about cutting up perfectly good books. Yard sales and thrift stores you can usually find books that are well worn, damaged, or falling apart. These creative projects give them a second chance to provide joy and new memories.
Post a Comment
I would SO love to hear from you!