Friday, November 11, 2011

Labels for my Pantry

This project I have been meaning to do for more than 6 months... probably more really. I finally broke out my Cricut and made some labels. I want a lovely pantry like House of Smiths. I know pretty much everyone has seen it. Well I want everything all labeled and organized and pretty, so I have begun to copy things that she has done in her pantry. Like this baking supplies crate. I took a 40% off unfinished wood crate from Michaels and stained it with some stain I had sitting in my garage.
 It looks so good with the labels on it!
I Mod Podged over it to hopefully make it last a while. I was too impatient to wait for it to dry so that is why the wood looks whitish.
 Then there are my jars -
 Yay! Now my silly husband won't confuse powdered sugar for flour!
(really? yes.. *shakes head*)

  Then I found this bottle at T.J. Maxx for only a buck!

 Of course I put maple syrup in it!
 Hooray! One more craft project to check off of my mile long list!
If you have a Cricut do you know about Sure Cuts Alot software? I purchased it and LOVE!
You can use any font you have on your computer, plus dingbats. No need to buy tons of expensive cartridges. SCAL is what I used to do all of these labels. I love it because you lay all of the words you want out on a digital cutting mat and you can adjust the size to the exact height and width that you need them cut, plus move them around to where on the mat you want it cut at. I hook it up to my computer via a USB cable and click cut. Its pretty awesome. I just thought I would share the love. Here is a link if you are interested.


Tuesday, November 8, 2011

Cheap Monogram Art

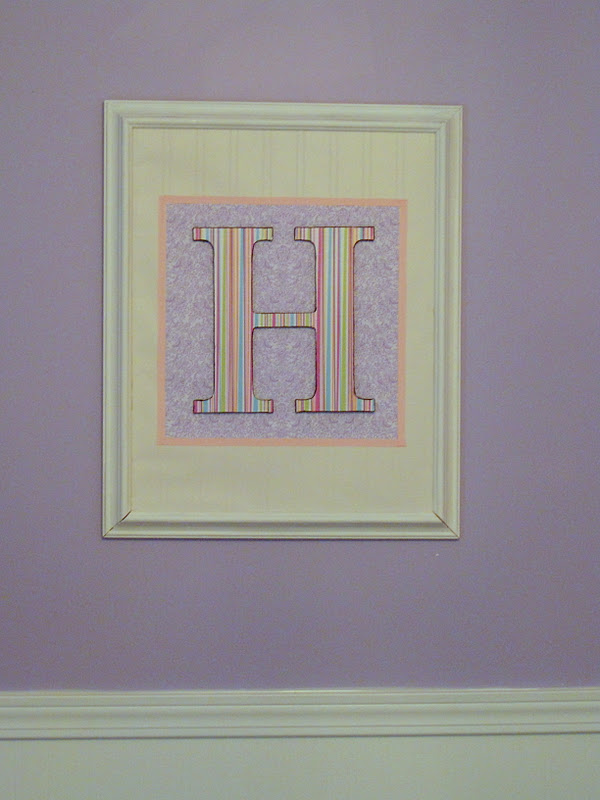
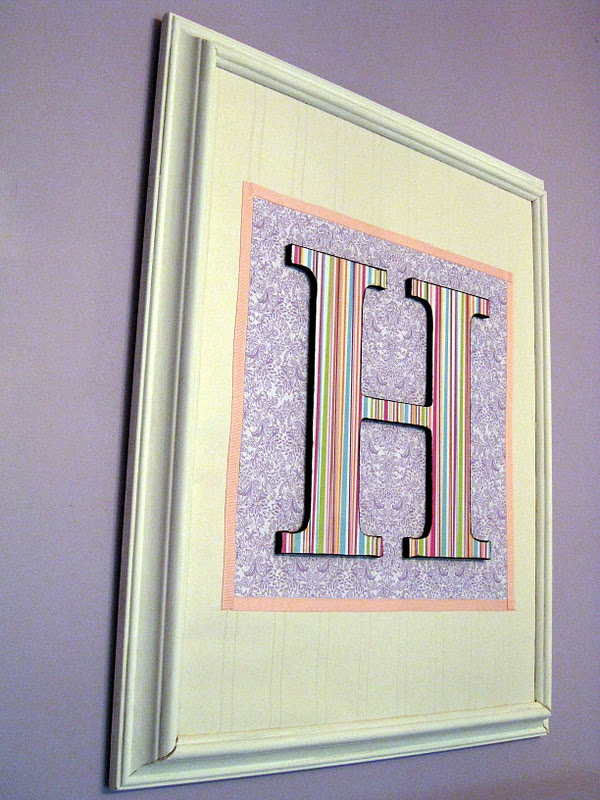
I am kind of proud of this scrappy project. It only cost me less than $2. It sort of shows, but hey! Its cheap art for my daughters room. I started off with a broken frame that my mom was throwing away. I rescued it, sort of fixed it, and painted it white.

 Then I took a wooden "H" I got at Hobby Lobby for a buck and Mod Podged some scrapbook paper to it. Actually I had already done that many weeks before I just didn't have any idea what I was going to do with it. I did paint the inside edges black so it would seem to stand out some. Though in this pic I hadn't done that yet.  
 Then (I didnt take pics of this) I took an old frame backing that I was saving for some reason and decided to tape a scrap piece of wallpaper from her room over the backing. I thought it needed a little something else so I took a square of scrapbooking paper and double sided super sticky taped it to the middle of the wallpaper. Then I said, hmmm, lets see what some ribbon looks like around the scrapbook square. So I used some more of that super sticky red line tape and taped it around the paper. It was grosgrain so I melted the ends with a lighter to prevent frays.

 And here is what I came up with:

 I decided that I liked it better not hanging over her bed and moved it to the big blank wall in her room.
Every good southern girl needs a monogram don't they? So there ya have it. My cheap-o , scrappy art for Hannah's room.


Linking to:
Visit thecsiproject.com

Sunday, November 6, 2011

Hannahs Room

So I have been working on my daughters room.... pretty much forever. When we built the house I painted stripes in her bedroom. I had gotten the inspiration from an HGTV show I saw only I was pretty sick of painting when it came to her room and I didnt feel like taping the stripes so I free handed it. Well, my hand is shaky and it was more like squiggles than stripes. I had intended to put chair railing up for, oh, about 6 years, but never nagged my husband enough. Here is what it had pretty much looked like for the past 6 years, only usually much messier.


 The stripes were cute, but they were visually messy. Since my daughter is a pretty messy kid ( no matter how much I try to make her otherwise) her room was always an eyesore to me.
I covered up the stripes with paintable, bead board look wallpaper and we finally added some chair rail in the form of door casing molding. We got a contractors pack and covered her room, the dining room, the mirrors in the bathrooms, my jewelry holder, and still have 2 long boards and a bunch of scraps left. All for $50!
Here it is now.. ahhhh!


Oh and we got her a bed from IKEA. I really wanted an antique iron bed, and almost had one from Craigs List, but I couldn't get it that weekend and the guy really needed to get rid of it quickly. Oh well. This one from IKEA is pretty nice for a little girl and its much sturdier than it looks.

 Here is the lighting before and after:

Ugly builders light                                                  
  Lovely crystal chandelier I found for $80 and added some plastic colored dangly's to it. And one of those ceiling medallions to cover up the ugly unpainted spot on the ceiling.
Its still a work in progress. I made a bed skirt from tulle but it needs a backing so I will have to share that later. I also want to add some sheers around the headboard and put up a few pictures or something. Then there's the side table which just has a scrap of fabric on it, the messy bookshelves and desk.... sigh.

Friday, November 4, 2011

Crochet Newborn Owl Hat

I didn't think I would get into the whole owl craze, but they are so stinkin' cute its hard not to. Even though I told myself I wouldn't. Now I am inflicting my cutesy owl like on others. This week I made this adorable (at least I think it is) crochet hat for a friends baby. She is a preemie so I hope she gets a chance to wear it before it gets hot again.
Awe! I came across a great, free pattern at Daisy Cottage Designs. Check it out.
I made a couple of changes. I didnt have any buttons that I liked for the eyes so I cut some circles of brown felt and just sewed it on. I did the same for the beak. I also decided that I wanted it to have some eyelashes so I just freehanded some from scraps of that brown felt.
Its a super easy pattern to follow and crochets up really quickly. She tells you how to make it without the ear flaps if you just want a beanie. I like the flaps though, and the braids on the ends were easy.

 I wasn't too sure if I liked it at first, but it kinda grows on you. A couple of teen girls saw it and commented that it was so cute! I figured it must be alright if they approved.


Linking to:

Visit thecsiproject.com


Wednesday, November 2, 2011

Autumn Sweater Wreath

How is it possible that it is already November ?  Its crazy how quickly this year has flown by. (It was crazier yesterday when I started this post) Next thing you know it will be New Years, and I just hung up an Autumn wreath on my front door yesterday!
Only, I cant figure out how I like it... and I really don't like it at all. I like the idea of it though. See, I had this sweater, which I wore every fall, that I absolutely loved. It got a hole in the armpit and I tried to fix it with my serger, which made it even worse and unwearable. It had been sitting in my craft closet for several years because I didn't want to throw it away. Then recently I saw where someone had taken a thrift store sweater and made a wreath out of it. I knew that would be the perfect thing for my beloved autumn sweater.  I took a straw wreath  and added a hanger to the back with floral wire.
I used an upholstery needle (curved like a "c") and twisted some floral wire into the eye. 
Then I chose a spot on the back, inserted the needle, which comes right back up to the back side, and twisted the ends of the wire together. I had to use pliers to pull the wire and needle through.
Then I pulled the wire so that the twisted together ends were inside the wreath. See?

I wanted the wreath form to have some bulk so I used straight pins and pinned on some batting all the way around the form.
Next I cut off the sleeves from my sweater and cut open the sleeve near the seam. This way I could wrap it around the wreath form and sew it back together on the back side of the wreath. I just pinned it in place first all the way around to keep it straight.  I used a whip stitch, but really you could just pin it well with pins and be done with it.
I just couldn't decide how to embellish it, and with the pattern it seemed too busy for anything, but too plain without something. I did take a bunch of old flowers and leaves I had and added a small bouquet to the middle and moved the bow. I think I like this better.
Hmmm. Maybe I should shorten the dangly bits of the bow. What do you think? Any other ideas?
I thought about some felt flowers, but the one I held up to it kind of disappeared against the pattern.
  I used the rest of the sweater and made a pillow from it. I save old ugly pillows for just such a purpose and so I just sewed up 3 sides and cut off the extra bits of sweater. Then I stuffed it with the old pillow and sewed up the side. The side seam ended up being the old, finished bottom edge of the sweater so I didn't bother tucking any raw edges under. Just sewed right across the seam. It would be cute, with some chunky, brown buttons but I didn't have any.

Awe. Now on to a new Christmas wreath. I probably should think about that before Christmas is over.


Linking to:

Todays Creative Blog

Tuesday, October 18, 2011

A Couple of Fall Yarn Wreaths

Well I am finally home from England and trying to get back into the Mommy/Wife role. I had an incredible time and sure didn't want to come home. I really would love to live there for a year or two. I will have to do a post soon about the trip, but for now I wanted to share a couple of Fall wreaths I made. I am a bit behind as I think everyone else in blogland is probably thinking about decorating for Christmas by now.

I made these for my side porch, which everyone uses as the front door. These are just straw wreath forms wrapped in super cheap yarn. I used Red Heart, Super Saver in "Aran Fleck". I think it kind of gives it the look of an Aspen tree.


I was going to decorate it totally differently, but that didn't work out so well.  So then I dug through my Fall decorating box and came across some old, silk,  fall leaves. I pinned them to the wreath with some floral wire bent into a U shape. I didn't want to glue it because I wasn't sure if I would like it or not (still not sure). Plus, I can easily change it out later on without ruining the hours spent wrapping the darn thing in yarn. I also added some felt flowers and a felt owl that I made. Here is the blog I came across with the pattern for the owl. It is suppose to be a Christmas ornament, but works well for Fall decor too. I glued mine together instead of sewing it, and stuffed it with felt scraps and yarn because I was too lazy to get up off the floor and search for my stuffing and I figured it was going outside.. who cares.  I also used felt scraps for the eyes instead of buttons.

The little guy on the other side is looking the other way. Awe.. so cute.

Anyways. Super simple wreath project and I suppose I could actually use it for Christmas too! Just pull off the leaves and stuff and add...something Christmassy! Oooh multi-seasonal decor.

Thanks for looking,


Linking to:
Visit thecsiproject.com