Showing posts with label DIY. Show all posts

Friday, December 30, 2011

Easy way to make pom-poms

I thought I would show you how I make pom-poms like the one I made for my recycled sweater hat.
First I cut a piece of yarn from the same yarn I want to make my pom-pom out of. Cut it about 6-8 inches long. Next slide it between your ring and middle finger like you are flossing your teeth. This will be used later to secure the pom-pom.
Next start wrapping the yarn around your fingers a million times or until it is very thick. Be careful not to wrap up the yarn you flossed your fingers with. A heavier weight yarn (thicker) will work up quicker and take less yarn than a light weight one.  The one I used for this tutorial is a bulky weight (#5) washable wool. It just depends on the look you like. I found that the thicker yarn gives it a fluffier appearance.
When your fingers are nicely cocooned in yarn, cut it from the skein/ball. Now take the two loose ends of your finger floss and bring them up to the top of  your fingers like so.
 Either get a willing person to tie it into a VERY tight knot for you, or gently slide it off of your fingers and tie it yourself. This is what you will end up with.
 Now take your scissors and start cutting the middle of the loops all the way around. This picture shows half of the loops cut.
On this pom-pom I chose to keep the 2 ends from the finger floss long so that I could use them to tie the finished pom-pom onto the top of my hat. You may need to trim up any longer than average ends on your pom-pom. If you don't need the tie just trim it to match the other strands of yarn.
Its really super quick and easy. I made a bunch the other night while watching Netflix. Made with my fingers they are about 3 inch sized pom-poms. Just use less fingers for smaller sizes. No need to buy a pom-pom maker!

Thursday, December 29, 2011

DIY Hat and Mittens From an Old Sweater

I have a pin on Pinterest from MarthaStewart.com. They used an old wool sweater and made mittens from it. I thought it was a great idea so last time I was in Goodwill I found a sweater that was half off and gave it a try. I am pretty sure the sweater was under $2. Here is a blurry picture of it.
 The Martha Stewart one tells you to wash the wool to felt it. Mine is cotton so that won't happen, which is fine with me. I decided to use the sleeves to make my mittens.  and to make them long to keep my wrists warm.
First I cut off the sleeve to a length an inch or so longer than I wanted the mitten.
 Then I cut out a mitten shape . I put my hand in the sleeve and cut around my fingers and thumb leaving about a half inch or so for a seam.

Next I used turned the pieces right sides together and used my sewing machine to stitch around the raw edges. I started with a zigzag stitch but I think a straight stitch works better. I decided to use my serger to finish off the edges but it will work just fine with just your sewing machine if you don't have a serger. Though I must say that I love my serger and think anyone who likes to sew should own one.
Sadly I didn't take many pictures of the mitten making process. I was in a hurry to make them and leave the house.  I did a little more cutting and sewing around the wrist on the thumb side to make it more fitted. Sorry.. this tutorial stinks, but you get the idea.
Here they are done.
 Pretty cool huh?
This next one you can see where I shaped the thumb side wrist part. It feels more snug now.
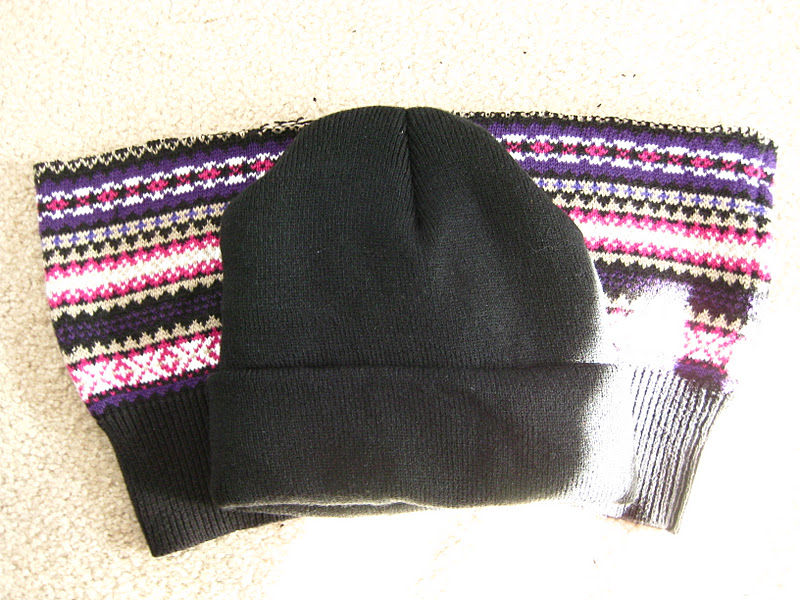
That done I decided that I would try to make a hat with the bottom edge of the sweater. I cut off a chunk from the bottom and used my husbands hat as a guide for cutting it out.
As with the mittens I just serged around the raw edges, wrong sides together. I also sewed a ... I guess its a dart in the top. Like the store bought one in the picture above has.  Here is what it looks like from the inside. It just gives it a more rounded appearance.
The "darts" are the bumps at the top and bottom and the left and right are the seams from where I sewed the 2 halves together. Does that make sense to anyone but me?

I made a pom-pom for the top and here is the finished hat.
 I have a huge head for a girl so I don't think it looks all that grand on me, but its a pretty cute hat.
The sweater I bought was a ladies small and here is all the sweater I have left.
You could make hats and mittens for the whole family with a giant mans sweater! ... And a wreath and pillows!
Yay for upcycling!

Monday, September 12, 2011

DIY Camera Handstrap

I am headed to England in about 17 days. This will be my very first time leaving North America. I am so crazy excited that I want to go pack my bags right now. OK..... I actually already started putting my toiletries in travel size bottles and packing the ready ones in my quart size zippered bag.
I am going with 6 other ladies in my church bookclub. We plan to visit all sorts of places, including some Jane Austen tours, towns and museums, castles, gardens, old houses. We are visiting Glastonbury Tor because we read the book. "Glastonbury Tor". Should be so neat to see it. Our schedule is jam packed and we will be there for about 10 days. Eeeeeeeee! I cant wait! Look at the cottage we are staying in!


I will be taking tons of pictures, no doubt, so I will be carrying my DSLR as well as my little purse size camera, along with lots of memory cards. I bought (yes I know I could have made it) this bag insert, and I believe it will work nicely. I plan to put it down in the bottom of a big sack like purse. 
Now I dont know about you, but I hate those neck straps that come with cameras. I jazzed mine up, but to me a neck strap gets in the way and I never really used it. I thought a hand strap would work much better for me. I dont care to carry it around my neck, and get punched in the gut every time I take a step. I also dont care to scream tourist.
(Oh mercy I can't believe I just posted this pic of me)
I considered buying a hand strap but then in the back of my mind I recalled seeing directions on making one on Photojojo... please visit that site if you love photography stuff. They ROCK!
 Their directions for making a "Dashing DIY Handstrap" are super easy to follow and super easy to make. Here is my new strap.
 Man its hard to take a picture of my right hand holding a camera with my left hand and trying to make it look good. 

 I bought black webbing and took their suggestion to add ribbon. I just used Crafters Pick- The Ultimate to glue it onto the webbing. Fabulous stuff!

I found the slide at JoAnn in the notions section. It was gold so I spray painted it black to match. I decided to go with the metal slide because it seemed more sturdy to me.

Here are a few things I did differently. I decided to use a cotton  webbing instead of polyester. Its much softer on my girly hands. Since I used cotton I couldn't melt the ends. Instead I dipped the ends in Mod Podge. It worked perfectly!
In their instructions they said to use a 1/4 inch, 1/2 inch long bolt. It took lots of searching (they had a bazillion nuts and bolts), but I found these at Lowes and they are 1/4 long. Also, the top is nice and flat. I didnt need to use the nuts and washers that they recommended since my bolt was shorter. 
  
See! Nice slim profile. I think I like mine better than theirs.

It was so fast and easy to make. I know it was only a few bucks (or less) for materials, I just didnt take the time to add it up.  Thanks for checking it out.