Showing posts with label yarn. Show all posts

Monday, February 6, 2012

Spring Pom-Pom Wreath

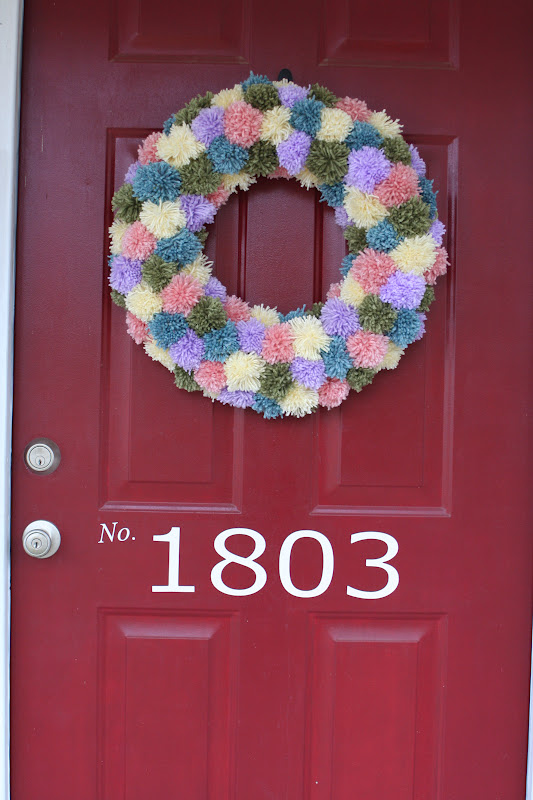
So I made a pom-pom wreath. Super easy and a nice way to use up some of the yarn in my stash.

I started with a large straw wreath that I had bought half off at Hobby Lobby this Fall.  Then I wrapped it in some pink fabric from my fabric stash. Not necessary, but I didn't know if all that hot glue I was going to be adding to it would melt the plastic that was on the wreath and I didn't want to take off the plastic because straw wreaths are messy. Nothing fancy, just glue it on and cover up all of the straw.
 I am ashamed to actually be posting that picture, but it was the only one I had. :-/
Next I made a bazillion and one pom-poms with my finger wrapping method, and hot glued them on. I tried  to glue them on so that no two exact colors were right next to each other or too close together. I wanted a random look so I didn't line them up directly next to each other either.. well some of them were like in the above pic.
That's about it. The only pain in the butt was making those pom-poms. I guess it wasn't a pain so much as boring. I did make most of them while watching Netflix though so that helped.
 I think if I ever did this again I would probably use a smaller wreath. Maybe 12inch instead of 18inch.

I used 5 different colors of yarn. Any more and it may have been a bit too much....or maybe it is already?

 I am pretty pleased with it. I thought to hang it like you see on my front door. Only I couldn't keep it there permanently because I was imagining how hot it was getting already and the bugs that might like to make their homes in the softy-wofty pom-poms. Mainly wasps. eeek! It only stayed on the door long enough to take these pictures.


Hmmm. What do you think? Does it need something else? I just felt like adding anything else might make it look overboard. Am I right? I dunno.


Linking to:

Visit thecsiproject.com

Friday, December 30, 2011

Easy way to make pom-poms

I thought I would show you how I make pom-poms like the one I made for my recycled sweater hat.
First I cut a piece of yarn from the same yarn I want to make my pom-pom out of. Cut it about 6-8 inches long. Next slide it between your ring and middle finger like you are flossing your teeth. This will be used later to secure the pom-pom.
Next start wrapping the yarn around your fingers a million times or until it is very thick. Be careful not to wrap up the yarn you flossed your fingers with. A heavier weight yarn (thicker) will work up quicker and take less yarn than a light weight one.  The one I used for this tutorial is a bulky weight (#5) washable wool. It just depends on the look you like. I found that the thicker yarn gives it a fluffier appearance.
When your fingers are nicely cocooned in yarn, cut it from the skein/ball. Now take the two loose ends of your finger floss and bring them up to the top of  your fingers like so.
 Either get a willing person to tie it into a VERY tight knot for you, or gently slide it off of your fingers and tie it yourself. This is what you will end up with.
 Now take your scissors and start cutting the middle of the loops all the way around. This picture shows half of the loops cut.
On this pom-pom I chose to keep the 2 ends from the finger floss long so that I could use them to tie the finished pom-pom onto the top of my hat. You may need to trim up any longer than average ends on your pom-pom. If you don't need the tie just trim it to match the other strands of yarn.
Its really super quick and easy. I made a bunch the other night while watching Netflix. Made with my fingers they are about 3 inch sized pom-poms. Just use less fingers for smaller sizes. No need to buy a pom-pom maker!