Showing posts with label Christmas. Show all posts
Friday, December 16, 2011
Wednesday, December 14, 2011
Homemade Christmas Ornaments
I have been working on my Pinterest crafty boards making things that I have pinned. Lately its been ornaments. I have a few to show you today.
Last week we had our annual ladies ornament exchange at our church. We do it Yankee swap (Chinese Gift Exchange, Dirty Santa, Thieving Secret Santa, Parcel Pass, Christmas Swamp Thing, or Pollyanna) style. Usually my homemade ornaments aren't too popular, but this year it actually got "stolen" as many times as it could before being "frozen". It made me happy. Here is the ornament I made.
I always wanted to try quilling so I googled quilled snowflakes and found a site that had snowflakes and patterns you could buy to show you how to make a quilled snowflake in a glass ornament. I wasn't willing to pay the money for it so I thought I would try it out myself. I just read up on the basics of quilling and did my own design. I used some medical forceps (long gripping type, scissor handled like tools) and tacky glue and constructed it like a ship in a bottle.
You probably can't tell from the picture, but it is not a round ball, its one of those disk type ornaments.
This pic is the ornament held up to a lampshade.
Once it was all dry I added some iridescent "snow" and tied a double sided ribbon and loop to hang it to the top.
It is very simple, but time consuming. This is my first quilled project. You can buy quilling paper that is pre-cut and tools for rolling the paper, but I used printer paper that I cut (not as perfect as the store stuff) and used my free tools, that God gave me, to roll the paper (fingers). I added a "crystal" to the middle of it also. You cant really tell from the photos. It gives it a little extra bling.
Here is another ornament I made just because I thought she was cute.
A felt and embroidery Matryoshka doll ornament. I got the directions and inspiration from My Sparkle blog. Hers is much cuter.. I think mine looks a bit like one of those Pai Dong Long Neck People. Still, I love her. Doesn't she have a sweet face?
Yesterday I was in Old Navy and passed by the huge impulse buy items in the checkout lanes. I impulsively decided that my daughter needed a pink, glitter water bracelet and my son needed a six pack of press and go mustaches. He was like.. "What do I need those for!". I replied to be cool and that I would wear one too. So I did.
When I was done playing I got an ah-ha moment. I decided that it would be perfect for sort of recreating a little ornament I had pinned on Pinterest. Here it is. I think it quite hilarious.
Here is my version. My husband pointed out that they misspelled staching so I made sure to do it right on mine.
It took me too many tries to write the wording with a paint pen. My print is awful, and this was a "good" one. I was going to use my Cricut but I let a friend borrow it. I may still re-do it, but for now it works. I used a disk ornament filled, once again, with "snow". I tell ya, that little bag had more "snow" in it than the whole state of Georgia gets in a year.. maybe two. Next I tied it off with a cute ribbon scrap I had beensaving hoarding for many many years.
And thats all!
Made any cute ornaments lately? Do share! I always need inspiration.
Linking to:

Last week we had our annual ladies ornament exchange at our church. We do it Yankee swap (Chinese Gift Exchange, Dirty Santa, Thieving Secret Santa, Parcel Pass, Christmas Swamp Thing, or Pollyanna) style. Usually my homemade ornaments aren't too popular, but this year it actually got "stolen" as many times as it could before being "frozen". It made me happy. Here is the ornament I made.
I always wanted to try quilling so I googled quilled snowflakes and found a site that had snowflakes and patterns you could buy to show you how to make a quilled snowflake in a glass ornament. I wasn't willing to pay the money for it so I thought I would try it out myself. I just read up on the basics of quilling and did my own design. I used some medical forceps (long gripping type, scissor handled like tools) and tacky glue and constructed it like a ship in a bottle.
You probably can't tell from the picture, but it is not a round ball, its one of those disk type ornaments.
This pic is the ornament held up to a lampshade.
Once it was all dry I added some iridescent "snow" and tied a double sided ribbon and loop to hang it to the top.
It is very simple, but time consuming. This is my first quilled project. You can buy quilling paper that is pre-cut and tools for rolling the paper, but I used printer paper that I cut (not as perfect as the store stuff) and used my free tools, that God gave me, to roll the paper (fingers). I added a "crystal" to the middle of it also. You cant really tell from the photos. It gives it a little extra bling.
Here is another ornament I made just because I thought she was cute.
A felt and embroidery Matryoshka doll ornament. I got the directions and inspiration from My Sparkle blog. Hers is much cuter.. I think mine looks a bit like one of those Pai Dong Long Neck People. Still, I love her. Doesn't she have a sweet face?
Yesterday I was in Old Navy and passed by the huge impulse buy items in the checkout lanes. I impulsively decided that my daughter needed a pink, glitter water bracelet and my son needed a six pack of press and go mustaches. He was like.. "What do I need those for!". I replied to be cool and that I would wear one too. So I did.
When I was done playing I got an ah-ha moment. I decided that it would be perfect for sort of recreating a little ornament I had pinned on Pinterest. Here it is. I think it quite hilarious.
Here is my version. My husband pointed out that they misspelled staching so I made sure to do it right on mine.
It took me too many tries to write the wording with a paint pen. My print is awful, and this was a "good" one. I was going to use my Cricut but I let a friend borrow it. I may still re-do it, but for now it works. I used a disk ornament filled, once again, with "snow". I tell ya, that little bag had more "snow" in it than the whole state of Georgia gets in a year.. maybe two. Next I tied it off with a cute ribbon scrap I had been
And thats all!
Made any cute ornaments lately? Do share! I always need inspiration.
Linking to:
Christmas Canvas Redemption
First of all let me say how excited I am. I just reached 50 followers!!! I never expected to get any, let alone 50. Thank you all!
So, I had the "bright" idea of taking the calendar pages from my daughters My Little Pony calendar and turning it into cheap artwork for her bedroom wall. The calendar was only a buck last year so the pages are made out of recycled toilet paper.. or something. They are that thin. I thought I would Mod Podge a few onto some 12x12 canvas like I did with my family photos. It didn't turn out so well.
So now I had 2 canvases that were ruined with these ugly ponies on them.
The other day I saw a Facebook post from Mod Podge Rocks (love that blog!), where a blogger took a canvas and made it into a Christmassy scene with scrapbook paper. Here it is.
I pinned it on Pinterest. By the way if you are not on Pinterest you should be. If you are, you should follow me and I should be following you.

Isn't it adorable? I figured I could do this and hopefully redeem my ugly canvases. I had just happened to buy a Christmas paper pack from Hobby Lobby (50% off). Here is the worst of the 2 ruined canvases that I used for this project. I tried to peel the page off and that didn't turn out so well either.
I used a paper for the background, unlike the inspiration picture, for obvious reasons. Still, if I had started with a blank canvas I would still use a background paper. I like the look. I used that light green one with snowflakes.
Here is my version. (click on inspiration pic link for directions if you need them)
I love it! You can still see some of the wrinkles from the pony pic underneath, but its not so bad.
For the tree trunks I used a paper coffee cup sleeve I happened to have. Ric-rack was used for the ground/snow. I Mod Podged and/or glued everything down.
For the tops of the trees I decided to use some "crystal" snowflake stickers I had bought the same time as the paper. Also half off !
Ever go just a step too far in your crafting? I do all the time. I added some ribbon braiding to the side of the canvas and may have gone too far. Maybe not. Christmas is one time of the year where you can get tacky.
hmmm. Did I redeem the ruined canvas? I am happy with it.
Thanks for looking.
So, I had the "bright" idea of taking the calendar pages from my daughters My Little Pony calendar and turning it into cheap artwork for her bedroom wall. The calendar was only a buck last year so the pages are made out of recycled toilet paper.. or something. They are that thin. I thought I would Mod Podge a few onto some 12x12 canvas like I did with my family photos. It didn't turn out so well.
So now I had 2 canvases that were ruined with these ugly ponies on them.
The other day I saw a Facebook post from Mod Podge Rocks (love that blog!), where a blogger took a canvas and made it into a Christmassy scene with scrapbook paper. Here it is.
I pinned it on Pinterest. By the way if you are not on Pinterest you should be. If you are, you should follow me and I should be following you.
Isn't it adorable? I figured I could do this and hopefully redeem my ugly canvases. I had just happened to buy a Christmas paper pack from Hobby Lobby (50% off). Here is the worst of the 2 ruined canvases that I used for this project. I tried to peel the page off and that didn't turn out so well either.
I used a paper for the background, unlike the inspiration picture, for obvious reasons. Still, if I had started with a blank canvas I would still use a background paper. I like the look. I used that light green one with snowflakes.
Here is my version. (click on inspiration pic link for directions if you need them)
I love it! You can still see some of the wrinkles from the pony pic underneath, but its not so bad.
For the tree trunks I used a paper coffee cup sleeve I happened to have. Ric-rack was used for the ground/snow. I Mod Podged and/or glued everything down.
For the tops of the trees I decided to use some "crystal" snowflake stickers I had bought the same time as the paper. Also half off !
Ever go just a step too far in your crafting? I do all the time. I added some ribbon braiding to the side of the canvas and may have gone too far. Maybe not. Christmas is one time of the year where you can get tacky.
hmmm. Did I redeem the ruined canvas? I am happy with it.
Thanks for looking.
Saturday, December 10, 2011
Sparkly Bright Christmas Tree
Ok. Well maybe its not as bad from a distance, but you have to agree, its much better lit up.
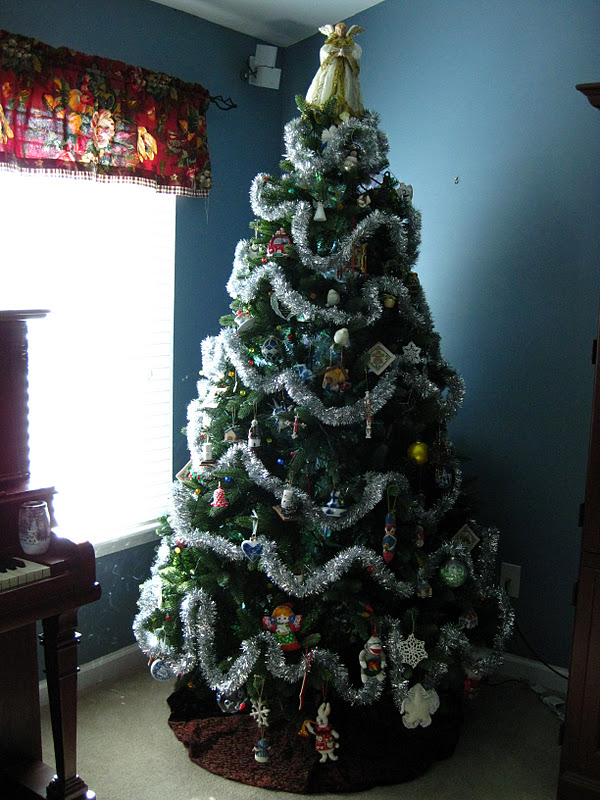
Here she is a few years ago.
I love the LED lights. My tree is pre-lit mostly. Since some strands are burnt out but I added several strands of LED. They really brighten up the tree.
One simple trick I use to make my tree extra sparkly is this: Iridescent cellophane. Seriously. Cut it up into ....oh lets say 12x12 squares or so and shove it into the tree around the pole in the middle. Also in spots that look a little sparse.
See it? I got my roll of cellophane at Michaels, probably 10 years or more ago. I have been using the same squares every Christmas since.
And now, since I don't want to do a whole post on it, I thought I would show you the outside of my house all lit up. I "invested" in all LED lights for the outside this year. Some of them I got on sale last year after Christmas.
I am loving the brilliant light these LED put out.
Here is my tree from the outside-
Do you have any tips for making your tree extra sparkly and bright?
Saturday, December 3, 2011
Christmassy Dining Room Chandelier
I have decorated my dining room chandelier the same way for the past 4 or 5 years. Usually like this.
I usually have a red and green plaid shades for the lights. Not sure why I didn't put them on the year I took this picture.
Well, this year I wanted something different so I remembered something I found on my brilliant blogger friends blog, Anythingology . She has a post about how she adds bling to her chandeliers. (she has a great blog and the best ideas... spend lots of time there and become a follower) Its just brilliant and makes me wish I had thought of it.
So using her method I got some cheap bead garland from Hobby Lobby for half off ( $1) and a pack of glittery green snowflakes for half off too. I re-used that ancient greenery in the picture above and here is what I came up with.
I like it much better now.
Cheap sparkly ornaments
Next year it will be so easy to put up. Just a few minutes.
Have you gone to Anythingology yet to see how I did this? tsk tsk tsk. OK. Finish looking at my pictures first then go. My links do open in a new tab so you wont go wandering from my blog too soon :)
The end.
I usually have a red and green plaid shades for the lights. Not sure why I didn't put them on the year I took this picture.
Well, this year I wanted something different so I remembered something I found on my brilliant blogger friends blog, Anythingology . She has a post about how she adds bling to her chandeliers. (she has a great blog and the best ideas... spend lots of time there and become a follower) Its just brilliant and makes me wish I had thought of it.
So using her method I got some cheap bead garland from Hobby Lobby for half off ( $1) and a pack of glittery green snowflakes for half off too. I re-used that ancient greenery in the picture above and here is what I came up with.
I like it much better now.
Next year it will be so easy to put up. Just a few minutes.
Have you gone to Anythingology yet to see how I did this? tsk tsk tsk. OK. Finish looking at my pictures first then go. My links do open in a new tab so you wont go wandering from my blog too soon :)
The end.
Tuesday, November 22, 2011
Its beginning to look a lot like Christmas
Last year after Christmas I went out and got myself a white Christmas tree and some ornaments for super cheap. I was inspired by a tree I had fallen in love with at Stone Mountain Park and decided that I just HAD to have one similar to it in my bedroom. Even though it was past Christmas I decided to put it up and decorate it because I just couldn't wait a whole year! Well, the tree itself stayed in my room this whole year. I did eventually take off the decorations and I even put some hearts on it for Valentines and shamrocks for March. Then I got bored with it and there it sat... because there was no room for it in the garage. Plus there was no way it was fitting back in that miniscule box it came in. This is what I have been looking at for the past year:
I couldn't stand it anymore so I decorated it tonight.. eeee! I love it just as much as I did last year!
I got these HUGE ornament balls on clearance at our BJ's club. I love them.
This adorable polkadot ribbon I got at Michaels on clearance.
Here is a shot with the flash on so you can see the star on top. It was just a metal star I got on clearance at Michaels and just spraypainted it white then glittered it with Martha Stewarts "white gold" glitter. Its basically silver with a hint of gold.
I didnt like the look of that pink tulle I had added under the tree so I took it out. Basically the tree "skirt" is just some scraps of white fabric I had and some tulle like white with silver stars on it. Those were scraps too.
I think it has too many balls on it and I hope to find some cheap different shapes in the colors already on it to break up all the spheres going on. But oh how I love thee white girly Christmas tree.
Linking to:
Thrifty Decor Chick
Thursday, November 17, 2011
Black Christmas Ornaments ?
Have you seen these matte black, glass Christmas ornaments? I found some at Hobby Lobby.
I am not sure how I feel about them. They are definitely not traditional Christmas. I do think they are fascinating though, especially if you have a white and black theme. I put up a small white tree with black ornaments for my guest bathroom but these are too big for it.
I saw once where a lady painted little dots all over it and I thought it was so pretty! I found them on Etsy and she wants $55 for one!!!! EEK!
It really is quite beautiful though. See?
I thought I would play around with some, just try them out, and see what I could come up with. Ummmm. Warning! I am no artist so these look more like my kids did it. I figure I could make tons of dots like that solid blue dot one up there. That doesn't seem so hard. I made one with green and red paint pens.
Ya. See what I mean. I am going to pretend that its just whimsical that I was going for and not .. I am bored with this dot making already. That's it. I think I must have gotten a shot of the side that I did last. Surely the other side has perfectly circular dots.
I also thought I would do a poinsettia just to see if that made a black ornament look any more Christmassy. Not so sure it did.
ahhh. Crap-tastic! I never did like coloring. Waste of time that.
This one is my most favorite one of the three that I did. I found some henna drawings and sorta tried to copy it. Its cool, but not really Christmassy.
hmmm. Bad side again.
I think some glitter would be pretty cute on it. (stopping now to go try it out) Here is one I just quickly did with thin double sided tape and glitter. Its an idea anyways.
Oh mercy... these look awful enlarged! For real though, have you seen these? If so have you ever bought them? Did you keep them plain? I would love to hear or see what people have done with them. I didn't have any luck with my Google search except that they would be good plain with other solid colors for a sports theme related tree. No thanks.
I am not sure how I feel about them. They are definitely not traditional Christmas. I do think they are fascinating though, especially if you have a white and black theme. I put up a small white tree with black ornaments for my guest bathroom but these are too big for it.
I saw once where a lady painted little dots all over it and I thought it was so pretty! I found them on Etsy and she wants $55 for one!!!! EEK!
It really is quite beautiful though. See?
I thought I would play around with some, just try them out, and see what I could come up with. Ummmm. Warning! I am no artist so these look more like my kids did it. I figure I could make tons of dots like that solid blue dot one up there. That doesn't seem so hard. I made one with green and red paint pens.
Ya. See what I mean. I am going to pretend that its just whimsical that I was going for and not .. I am bored with this dot making already. That's it. I think I must have gotten a shot of the side that I did last. Surely the other side has perfectly circular dots.
I also thought I would do a poinsettia just to see if that made a black ornament look any more Christmassy. Not so sure it did.
ahhh. Crap-tastic! I never did like coloring. Waste of time that.
This one is my most favorite one of the three that I did. I found some henna drawings and sorta tried to copy it. Its cool, but not really Christmassy.
hmmm. Bad side again.
I think some glitter would be pretty cute on it. (stopping now to go try it out) Here is one I just quickly did with thin double sided tape and glitter. Its an idea anyways.
Oh mercy... these look awful enlarged! For real though, have you seen these? If so have you ever bought them? Did you keep them plain? I would love to hear or see what people have done with them. I didn't have any luck with my Google search except that they would be good plain with other solid colors for a sports theme related tree. No thanks.
Subscribe to:
Posts (Atom)