This is a very simple Valentines Day project. I have seen lots of people do this type of thing so it isn't anything new. It was super easy and it only took a few minutes.
Get your chocolate bar. I got a Chocolove bar because I thought it fitting for Valentines day. Plus I am a chocolate snob and Hersheys is nasty junk. I only buy it for making s'mores.
Cute!
This is really good chocolate too. I got the super extra dark one, 77% cacao, for myself and it was fabulous. I found this brand at the Dekalb Farmers Market (Atlanta). I haven't seen them in grocery stores so I am not really sure where to find them. Sorry.
Next, I cut a piece of red card stock to fit around the bar. I also printed off a heart patterned paper and cut it slightly smaller than the red. I wish I knew where I got the heart pattern from but I can't remember. If you don't have heart card stock you can just Google "heart pattern" and find several images to print. I taped these tightly around the bar, but not to the chocolate wrapper itself.
I cut the edges with this Martha Stewart paper punch. Love that thing!
Then I crocheted up a super quick heart from some red yarn I had. Here is the pattern I used from Planet June. Great instructions! I made the medium sized one. It took maybe 5 minutes tops!
I used the tail end of the yarn to make a loop big enough to fit around the bar. It can be taken off and used as a little ornament.
And here it is all together. Simple. Cute. Yummy!
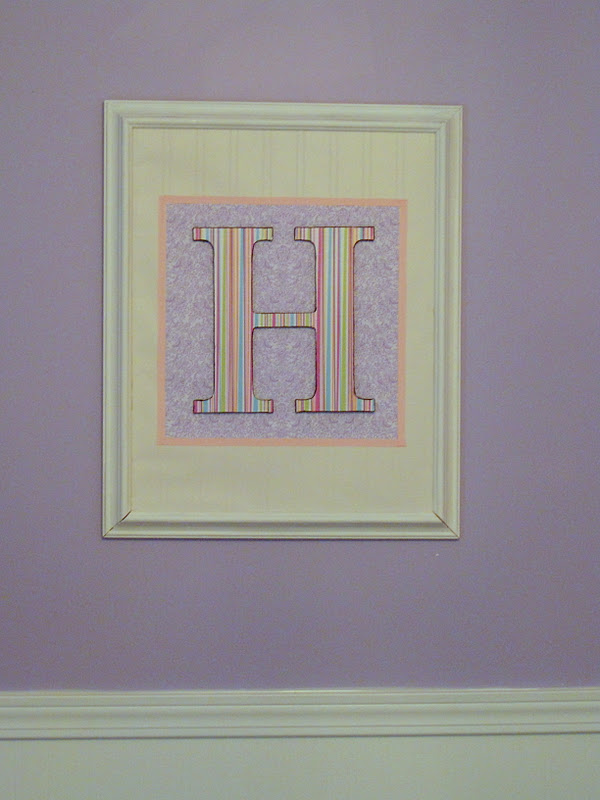
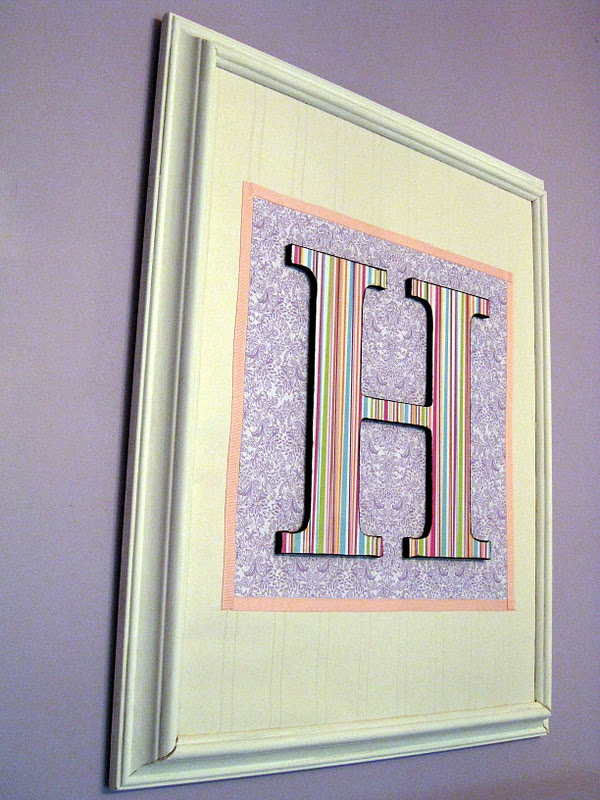
I am kind of proud of this scrappy project. It only cost me less than $2. It sort of shows, but hey! Its cheap art for my daughters room. I started off with a broken frame that my mom was throwing away. I rescued it, sort of fixed it, and painted it white.
Then I took a wooden "H" I got at Hobby Lobby for a buck and Mod Podged some scrapbook paper to it. Actually I had already done that many weeks before I just didn't have any idea what I was going to do with it. I did paint the inside edges black so it would seem to stand out some. Though in this pic I hadn't done that yet.
Then (I didnt take pics of this) I took an old frame backing that I was saving for some reason and decided to tape a scrap piece of wallpaper from her room over the backing. I thought it needed a little something else so I took a square of scrapbooking paper and double sided super sticky taped it to the middle of the wallpaper. Then I said, hmmm, lets see what some ribbon looks like around the scrapbook square. So I used some more of that super sticky red line tape and taped it around the paper. It was grosgrain so I melted the ends with a lighter to prevent frays.
And here is what I came up with:
I decided that I liked it better not hanging over her bed and moved it to the big blank wall in her room.
Every good southern girl needs a monogram don't they? So there ya have it. My cheap-o , scrappy art for Hannah's room.
I didn't think I would get into the whole owl craze, but they are so stinkin' cute its hard not to. Even though I told myself I wouldn't. Now I am inflicting my cutesy owl like on others. This week I made this adorable (at least I think it is) crochet hat for a friends baby. She is a preemie so I hope she gets a chance to wear it before it gets hot again.
Awe! I came across a great, free pattern at Daisy Cottage Designs. Check it out.
I made a couple of changes. I didnt have any buttons that I liked for the eyes so I cut some circles of brown felt and just sewed it on. I did the same for the beak. I also decided that I wanted it to have some eyelashes so I just freehanded some from scraps of that brown felt.
Its a super easy pattern to follow and crochets up really quickly. She tells you how to make it without the ear flaps if you just want a beanie. I like the flaps though, and the braids on the ends were easy.
I wasn't too sure if I liked it at first, but it kinda grows on you. A couple of teen girls saw it and commented that it was so cute! I figured it must be alright if they approved.
Well I am finally home from England and trying to get back into the Mommy/Wife role. I had an incredible time and sure didn't want to come home. I really would love to live there for a year or two. I will have to do a post soon about the trip, but for now I wanted to share a couple of Fall wreaths I made. I am a bit behind as I think everyone else in blogland is probably thinking about decorating for Christmas by now.
I made these for my side porch, which everyone uses as the front door. These are just straw wreath forms wrapped in super cheap yarn. I used Red Heart, Super Saver in "Aran Fleck". I think it kind of gives it the look of an Aspen tree.
I was going to decorate it totally differently, but that didn't work out so well. So then I dug through my Fall decorating box and came across some old, silk, fall leaves. I pinned them to the wreath with some floral wire bent into a U shape. I didn't want to glue it because I wasn't sure if I would like it or not (still not sure). Plus, I can easily change it out later on without ruining the hours spent wrapping the darn thing in yarn. I also added some felt flowers and a felt owl that I made. Here is the blog I came across with the pattern for the owl. It is suppose to be a Christmas ornament, but works well for Fall decor too. I glued mine together instead of sewing it, and stuffed it with felt scraps and yarn because I was too lazy to get up off the floor and search for my stuffing and I figured it was going outside.. who cares. I also used felt scraps for the eyes instead of buttons.
The little guy on the other side is looking the other way. Awe.. so cute.
Anyways. Super simple wreath project and I suppose I could actually use it for Christmas too! Just pull off the leaves and stuff and add...something Christmassy! Oooh multi-seasonal decor.
I have been putting this post off for a while. I figured that my 100th post should be super special. Since I can't figure out a super special project that I have done which is worthy of #100 I just decided to post a few pictures of things I have made. They are not worthy individual posts for each one, and probably not of post #100.
I may not post again for a few weeks. I will be leaving in one week for England and I have been super busy preparing my household for my departure. Gahhhh! I can hardly stand the excitement!
Here is a bag I made. I had hoped to bring it to England with me, but it just isn't as comfortable as I had hoped it would be, which it has to be if I am going to tote my camera around in it. Look how cute it is though!
I love this big button. I found it at Hobby Lobby near the curtain rods.
I just made a pattern by tracing a bag I bought online. Super simple.
Next up, a tutu I made for my friends baby. I just used elastic and spool tulle from Hobby Lobby.
Take the desired length of elastic and sew ends together. I have no idea what age child this will fit, and since she wasnt born yet I just guessed. Slip knot lengths of tulle around the elastic. I did pink, orange, pink, orange, etc. Another super simple project.
I might have to turn one into a lamp shade.It might work. hmmm.
I found this 5 light, crystal chandelier at Lowes for only $75! Down from like $300. I snatched it up. I decided to hang it in my daughters bedroom for now. She said she would like it better if it had pink on it, so I bought some plastic "crystal" beads and made my own dangles. She loves it!
And finally, I re-covered a wrist pin cushion to match my sewing room. It was a navy gingham. Just a scrap of fabric, hot glue, and a ribbon. Cute.
GIVEAWAY HAS ENDED! For your convenience all links open in a new tab
Its my very first give away, and I am SO EXCITED!
First off let me tell you about this awesome digital scrapbooking software that I have been playing around with for the past few days. If you know me, or have read my "about me" section, you would know that I am not a scrapbooker. I don't have the patience for it, and all the papers and embellishments would take up precious space in my fabric closet. HOWEVER (you saw that coming right?) I was given the opportunity to try out digital scrapbooking and I love it! Oh great. Now I have another craft hobby!
So I downloaded the software, which was super easy, and got right into the simple to use, My Memories Suite program.
Ok. As a disclaimer, I have no idea what to do when it comes to scrapbooking, and I don't know the rules.... if there are any. With that in mind here is something I whipped up using the free papers, embellishments, and such that came with the software. Don't judge too harshly. I'm a noob.
Here are a few pages from a small album I made with pictures from my 2009 annual Mother/ Daughter retreat. A getaway that my sisters, sis-in-law and mom take every fall. I never do anything with the pics and I think My Memories is perfect for organizing the fun times we have on these trips.
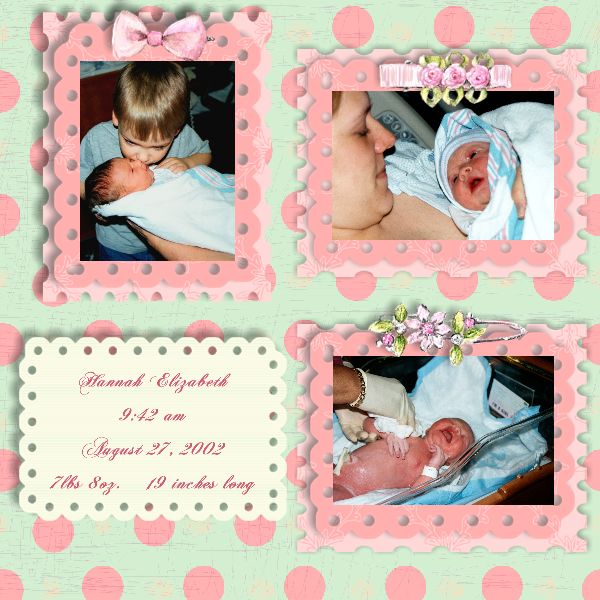
I probably should have done this first, but here is a pre-made template that was also available with the program. This sweet baby girl one was too cute.
Seriously... that child cried so much I decided I was done making babies.
The My Memories Suite software is much more than digital scrapbooking. You can make calendars, photo books, cards, you can add music, videos, web links, share it with friends and family... fun! You can buy different paper packs and pre-made templates and embellishments from them also. I could play with it all day, but I really wanted to share this with you before a month passed by and I was still sitting in this chair playing. So I thought I would add this somewhat cheesy video to show you all the other wonderful things you can do.
Alright. Here is the SUPER EXCITING PART! My Memories is giving one of you lucky duck readers a free download of the My Memories Suite, Digital Scrapbooking Software. For freeeeeeeee (make sure you read that like Adam Sandler in Bedtime Stories. Go back and read it again if you didnt.. its makes it much more exciting). That's an almost $40 value.
How, you say, can I enter?
Please visit My Memories. Browse around, come back here and leave a comment telling me what digital scrapbooking kit you like. This is a must. If you don't do this you don't get entered into the contest.
Want extra entries? Of course you do! I am going to give you several ways. Leave a comment that you did so for each of the following extra entries.
*Become a public follower of my blog. If you are already a follower, thank you, and just comment telling me so.
*Follow (or be a follower of ) my blog on Facebook .
*Tweet about this blog post.
*Follow My Memories blog
*Facebook,
* and Twitter.
Be sure to leave a separate comment for each extra that you did so you have multiple entries.
This contest will end Monday, August 29th at midnight (EST). I will use Random.org to determine the winner. On Tuesday (30th) I will announce the winner.
Be sure you have an email address connected with your comments. If you use Blogger or Google, just be sure that your email address is enabled. I believe you can post with other types of accounts also, like Wordpress. You can always add it to the bottom of your comments like so- fordjunkstuff (at) gmail (dot) com
For all of you un-lucky ducks, or those of you who don't want to enter the giveaway, but like what you see. My Memories has given me a coupon code to share with you. This coupon code provides a $10 discount on the purchase of the MyMemories Suite v2 scrapbook software. It also comes with a $10 coupon for downloads. (total value of $20!). They have a dollar section, so you could make that $10 stretch. I am all for that! This code is only good for My Memories Suite v2. It never expires so please use it, pass it on to friends and family, blog, Tweet and Facebook about it and have fun. Here ya go! Visit My Memories here and use this code - STMMMS97510
I was given my own free download of My Memories Suite, but my opinions are all my own... and I will give them too, don't ya know.
Several years back my incredibly talented Sis-in-law made me these awesome bookplates for my books.
They not only told the person that borrowed it who the rightful owner was, but also had a card in each one that I could take out and write the name of the borrower, title, author, and date they "checked it out" of my library.
Here's my library in case you are wondering why I would need such a thing (and haven't seen this picture already). I have 2 more 3-shelf book cases on the opposite wall.
I suppose I will do another post and tell you how I organize them, but for now...
Because I have all of these books, the ones my SIL gave me didnt go far, and I needed more. Lots more! For some reason at that time I decided every book I owned needed it. Now I just put them in the ones I actually lend.
To make your own you will need library pockets and lending cards. Mine were purchased from my local School Box. The pockets come in super fun patterns and plain colors. The ones my SIL made were black. Very classy and I love them. But School Box no longer carries them in black. I was using the plain manila ones but recently got these!
My favorite so far. For the personalization I have used shipping labels for the printer and printed it up that way. I have also used a card making program so that I could add pictures and print them up, several to a page, on card stock, then glue to the pockets.
The ones above I outlined with a pink marker to make it stand out.
The back of these pocket are self stick. Some of the plain pockets come without sticky tape. I always add more of my own anyways to be on the safe side.
Peel and stick to the inside front cover of your book. Personally I like to add it to the right hand page in paperbacks because it feels better in the hands when reading.
Add your info to the library card and add to your pocket. Remove it when you lend the book to a friend and keep it in a safe place.
I keep mine in a pencil box along with a pen, the extra pockets, and tape.
Here are a few that I have made over the years.
There you have it. A super simple and attractive way to label your books and keep track of those you lend.