Saturday, December 3, 2011

Christmassy Dining Room Chandelier

I have decorated my dining room chandelier the same way for the past 4 or 5 years. Usually like this.
I usually have a red and green plaid shades for the lights. Not sure why I didn't put them on the year I took this picture.
Well, this year I wanted something different so I remembered something I found on my brilliant blogger friends blog, Anythingology . She has a post about how she adds bling to her chandeliers. (she has a great blog and the best ideas... spend lots of time there and become a follower) Its just brilliant and makes me wish I had thought of it.
So using her method I got some cheap bead garland from Hobby Lobby for half off ( $1) and a pack of glittery green snowflakes for half off too. I re-used that ancient greenery in the picture above and here is what I came up with.

I like it much better now.


 Cheap sparkly ornaments

Next year it will be so easy to put up. Just a few minutes.
Have you gone to Anythingology yet to see how I did this? tsk tsk tsk. OK. Finish looking at my pictures first then go. My links do open in a new tab so you wont go wandering from my blog too soon :)


The end.

Tuesday, November 22, 2011

Its beginning to look a lot like Christmas

Last year after Christmas I went out and got myself a white Christmas tree and some ornaments for super cheap. I was inspired by a tree I had fallen in love with at Stone Mountain Park and decided that I just HAD to have one similar to it in my bedroom. Even though it was past Christmas I decided to put it up and decorate it because I just couldn't wait a whole year! Well, the tree itself stayed in my room this whole year. I did eventually take off the decorations and I even put some hearts on it for Valentines and shamrocks for March. Then I got bored with it and there it sat... because there was no room for it in the garage. Plus there was no way it was fitting back in that miniscule box it came in. This is what I have been looking at for the past year:
I couldn't stand it anymore so I decorated it tonight.. eeee! I love it just as much as I did last year!

I got these HUGE ornament balls on clearance at our BJ's club. I love them.
This adorable polkadot ribbon I got at Michaels on clearance.
Here is a shot with the flash on so you can see the star on top. It was just a metal star I got on clearance at Michaels and just spraypainted it white then glittered it with Martha Stewarts "white gold" glitter. Its basically silver with a hint of gold.
I didnt like the look of that pink tulle I had added under the tree so I took it out. Basically the tree "skirt" is just some scraps of white fabric I had and some tulle like white with silver stars on it. Those were scraps too.


I think it has too many balls on it and I hope to find some cheap different shapes in the colors already on it to break up all the spheres going on. But oh how I love thee white girly Christmas tree.


Linking to:
Thrifty Decor Chick

Friday, November 18, 2011

Photo Friday

I haven't had a Photo Friday in a good while so today I am giving you several pictures. I just took these yesterday. We have had one of the prettiest falls this year in a very long time... maybe ever since I have lived in Georgia. It was such a beautiful day today!After having to turn on the A/C the past few days, this weather in the 50's was refreshing.
I took these at F.D.R. State Park and the Little White House in Warm Springs, Georgia.


 This next one is President F.D. Roosevelt's house in Georgia, Little White House, where he would stay and swim in the therapeutic waters of Warm Springs. He died here in 1945.
  Such a cute cozy house.
Thanks for looking and if I don't post before then, Happy Thanksgiving!

Thursday, November 17, 2011

Black Christmas Ornaments ?

Have you seen these matte black, glass Christmas ornaments? I found some at Hobby Lobby.
I am not sure how I feel about them. They are definitely not traditional Christmas. I do think they are fascinating though, especially if you have a white and black theme. I put up a small white tree with black ornaments for my guest bathroom but these are too big for it.
I saw once where a lady painted little dots all over it and I thought it was so pretty! I found them on Etsy and she wants $55 for one!!!! EEK!
It really is quite beautiful though. See?

Source: etsy.com via Elizabeth on Pinterest


I thought I would play around with some, just try them out, and see what I could come up with. Ummmm. Warning! I am no artist so these look more like my kids did it. I figure I could make tons of dots like that solid blue dot one up there. That doesn't seem so hard. I made one with green and red paint pens.
Ya. See what I mean. I am going to pretend that its just whimsical that I was going for and not .. I am bored with this dot making already. That's it. I think I must have gotten a shot of the side that I did last. Surely the other side has perfectly circular dots.
I also thought I would do a poinsettia just to see if that made a black ornament look any more Christmassy. Not so sure it did.
ahhh. Crap-tastic! I never did like coloring. Waste of time that.
This one is my most favorite one of the three that I did. I found some henna drawings and sorta tried to copy it. Its cool, but not really Christmassy.
hmmm. Bad side again.
I think some glitter would be pretty cute on it. (stopping now to go try it out) Here is one I just quickly did with thin double sided tape and glitter. Its an idea anyways.
 Oh mercy... these look awful enlarged! For real though, have you seen these? If so have you ever bought them? Did  you keep them plain? I would love to hear or see what people have done with them. I didn't have any luck with my Google search except that they would be good plain with other solid colors for a sports theme related tree. No thanks.


Sunday, November 13, 2011

My first pair of knit gloves

Well, it only took me 11 months, but I just finished my very first pair of knit gloves. It really wasnt hard at all to do. Just boring. I made the first one in January this year. It only took me a few days to finish up the second one. It was just starting it up that I didnt want to do. I am not as in love with them as when I started, but having accomplished them makes me feel happy.
These aren't just any gloves. No, I made them with holes in the forefinger and thumbs.


Why? Because I thought it would be cool to be able to do this while wearing gloves.


 And even this!

 All I did was find a simple glove pattern in one of my knitting books. Since this was my first time making gloves I wanted a pattern that used Worsted weight yarn so that it would knit up quickly. I followed the pattern as written, but instead of finishing off the tops of the 2 fingers on each glove I simply cast off all the stitches at a length that I thought would be good.  I like them. Now my hands can stay warm when I am taking pictures in the cold months.
I am happy to be done. Now I can move on to another partly finished craft project. Or better yet, read that new Nicholas Sparks book that I just got in!

Friday, November 11, 2011

Labels for my Pantry

This project I have been meaning to do for more than 6 months... probably more really. I finally broke out my Cricut and made some labels. I want a lovely pantry like House of Smiths. I know pretty much everyone has seen it. Well I want everything all labeled and organized and pretty, so I have begun to copy things that she has done in her pantry. Like this baking supplies crate. I took a 40% off unfinished wood crate from Michaels and stained it with some stain I had sitting in my garage.
 It looks so good with the labels on it!
I Mod Podged over it to hopefully make it last a while. I was too impatient to wait for it to dry so that is why the wood looks whitish.
 Then there are my jars -
 Yay! Now my silly husband won't confuse powdered sugar for flour!
(really? yes.. *shakes head*)

  Then I found this bottle at T.J. Maxx for only a buck!

 Of course I put maple syrup in it!
 Hooray! One more craft project to check off of my mile long list!
If you have a Cricut do you know about Sure Cuts Alot software? I purchased it and LOVE!
You can use any font you have on your computer, plus dingbats. No need to buy tons of expensive cartridges. SCAL is what I used to do all of these labels. I love it because you lay all of the words you want out on a digital cutting mat and you can adjust the size to the exact height and width that you need them cut, plus move them around to where on the mat you want it cut at. I hook it up to my computer via a USB cable and click cut. Its pretty awesome. I just thought I would share the love. Here is a link if you are interested.


Tuesday, November 8, 2011

Cheap Monogram Art

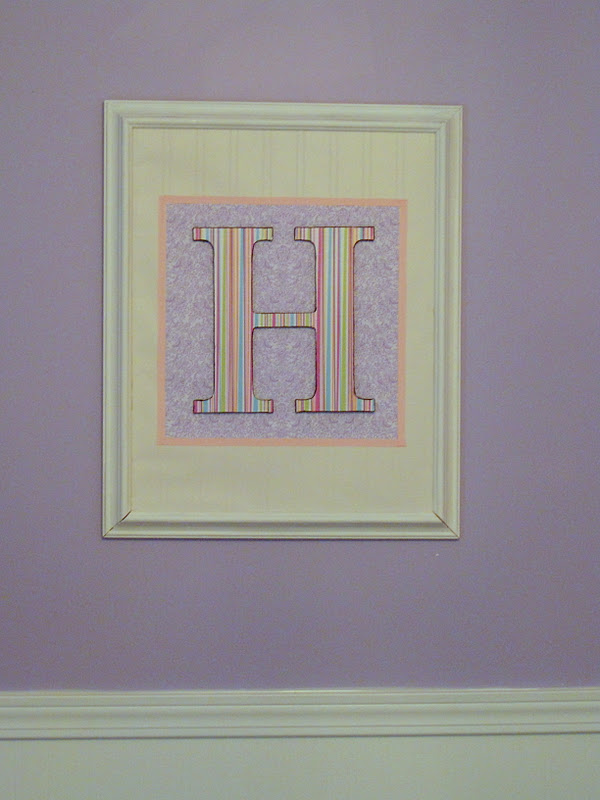
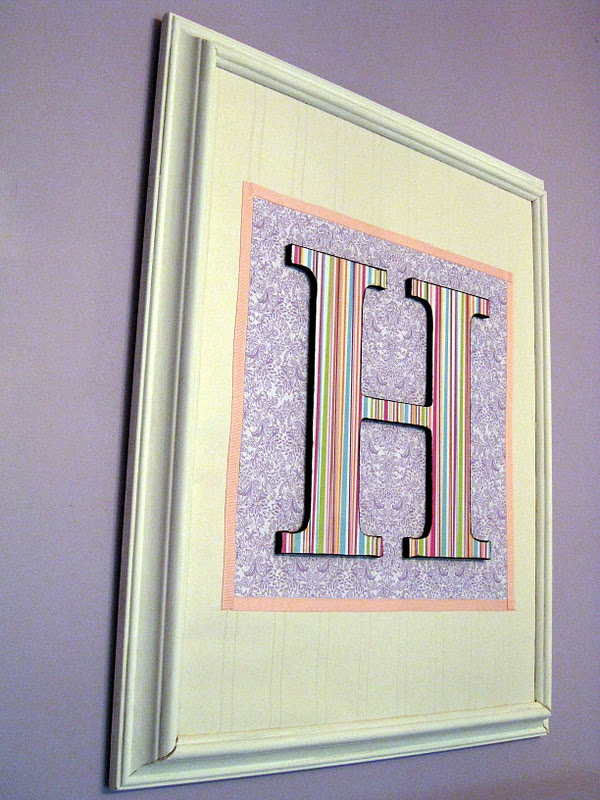
I am kind of proud of this scrappy project. It only cost me less than $2. It sort of shows, but hey! Its cheap art for my daughters room. I started off with a broken frame that my mom was throwing away. I rescued it, sort of fixed it, and painted it white.

 Then I took a wooden "H" I got at Hobby Lobby for a buck and Mod Podged some scrapbook paper to it. Actually I had already done that many weeks before I just didn't have any idea what I was going to do with it. I did paint the inside edges black so it would seem to stand out some. Though in this pic I hadn't done that yet.  
 Then (I didnt take pics of this) I took an old frame backing that I was saving for some reason and decided to tape a scrap piece of wallpaper from her room over the backing. I thought it needed a little something else so I took a square of scrapbooking paper and double sided super sticky taped it to the middle of the wallpaper. Then I said, hmmm, lets see what some ribbon looks like around the scrapbook square. So I used some more of that super sticky red line tape and taped it around the paper. It was grosgrain so I melted the ends with a lighter to prevent frays.

 And here is what I came up with:

 I decided that I liked it better not hanging over her bed and moved it to the big blank wall in her room.
Every good southern girl needs a monogram don't they? So there ya have it. My cheap-o , scrappy art for Hannah's room.


Linking to:
Visit thecsiproject.com