Friday, April 8, 2011
Monday, April 4, 2011
Dresser Makeover
I really wish I had a before, before pic to show you so you could see what this dresser looked like when I started. It was a really great dresser, sturdy and well made, but very retro. Not in a good way. I wouldn't say it was ugly, but it was just not pretty. My sister gave it to us though, so it was FREE! Which is always good.
Imagine it with me. It was all the same color as that darker brown in this picture. That blank middle section was 3 drawers. The lattice pattern on the left drawer is from a plastic, wood look panel that was screwed on top. All 3 of the top drawers had this with no drawer pulls.
Well my daughter needed a desk. So one day I thought this dresser would make a good one. I could remove the middle 3 drawers and cut that bottom section off to make a place for a chair and her feet. I worked on it until I got to cutting off the bottom section. My hubby said that it couldn't be done. :(
So I had him cut some scrap bead board to fit inside and then I painted the whole thing white. I left the drawer handles because I liked them. I then removed the handle-less drawers and replaced them with 2 of the handled ones. It worked well enough as a desk for my little girl, but after a while I wanted to get a real desk for her. I decided to use this in my sewing room to store crap in, and as a work surface. My original thought was to Mod Podge some pages from an old book onto it. You can see here on the left and side where I started to. I didn't care for it, so I scraped it off. (the old lattice drawer is just there for the before pic)
Then I came across an old dress pattern that I had. I am guessing from the picture on the front that it is from the 70's. Well I decided that it would look really cool Mod Podged to my dresser, and very appropriate for a sewing room. What do you think?
And here are some before and after pics.
Linking up:
Thrifty Decor Chick
Imagine it with me. It was all the same color as that darker brown in this picture. That blank middle section was 3 drawers. The lattice pattern on the left drawer is from a plastic, wood look panel that was screwed on top. All 3 of the top drawers had this with no drawer pulls.
Well my daughter needed a desk. So one day I thought this dresser would make a good one. I could remove the middle 3 drawers and cut that bottom section off to make a place for a chair and her feet. I worked on it until I got to cutting off the bottom section. My hubby said that it couldn't be done. :(
So I had him cut some scrap bead board to fit inside and then I painted the whole thing white. I left the drawer handles because I liked them. I then removed the handle-less drawers and replaced them with 2 of the handled ones. It worked well enough as a desk for my little girl, but after a while I wanted to get a real desk for her. I decided to use this in my sewing room to store crap in, and as a work surface. My original thought was to Mod Podge some pages from an old book onto it. You can see here on the left and side where I started to. I didn't care for it, so I scraped it off. (the old lattice drawer is just there for the before pic)
For the drawers I decided MP a red ticking fabric onto the fronts. You can sort of see it in the picture above, on the bottom right corner. I added several layers of MP and did a light sanding between coats with a super fine steel wool. This made it nice and smooth.
And here is the finished product!
I am on the lookout for the perfect basket(s) to put in that gaping, white hole in the middle. I have done some great organization in here too! See all that messy fabric? I cant wait to show you what I did with it, but that will have to wait for another post.And here are some before and after pics.
Linking up:
Thrifty Decor Chick
Friday, April 1, 2011
Thursday, March 31, 2011
Cash Envelope Wallet
Just wanted to show you this fabulous cash envelope style wallet I sewed this past week.
I did several searches online to find just what I was looking for. I wanted room enough for my cards, receipts/cash, and great organization. I was hoping to find a free pattern, or just figure it out on my own. I finally came across the perfect wallet, but it was on Etsy (BTW how do you pronounce that?). I figured I could just wing it but realized that there was no way I could do it so nicely on my own. Not to mention the frustration of trying to figure it out. Boy am I glad I didn't. Allison's shop on Etsy, Tres Marias, has the BEST pattern I have ever used. Well worth the $10 for the pattern. The instructions were so easy to follow, understand, and well written. It included several great pictures for reference so that I knew I was doing it right. I really wish she wrote patterns for Simplicity and McCall. A nice plus for me was that I ordered it, went to take my shower, and by the time I came back to the computer she had already emailed my pattern to download. If you don't want to sew one, she makes some super cute ones for her shop.
Dont you love this fabric? Remember my Iron post, where I had my fabric laying out underneath it? Yep this is what I did with it! I got it at Hobby Lobby. If you are wondering why its so shiny, that is because I used a really awesome thing called iron on vinyl. It's just what its called. Basically turns your fabric into a type of oilcloth. Super easy to apply, and I hope it will help keep it stain free. You can sew right through it too. I got mine at Hobby Lobby on the notions wall.
The other side of the envelopes has 3 more card pockets and one big pocket. If I carried around a checkbook it would fit nicely in one of the big pockets. You cant see it here, but there is also a zipper pocket . I hate doing zippers, but the instructions made it so easy to do, and I have never had a zipper look as well as this one did.
Guess that's it! Check out her great shop, and someone please tell me the proper pronunciation for Etsy!
Linking up with:


I did several searches online to find just what I was looking for. I wanted room enough for my cards, receipts/cash, and great organization. I was hoping to find a free pattern, or just figure it out on my own. I finally came across the perfect wallet, but it was on Etsy (BTW how do you pronounce that?). I figured I could just wing it but realized that there was no way I could do it so nicely on my own. Not to mention the frustration of trying to figure it out. Boy am I glad I didn't. Allison's shop on Etsy, Tres Marias, has the BEST pattern I have ever used. Well worth the $10 for the pattern. The instructions were so easy to follow, understand, and well written. It included several great pictures for reference so that I knew I was doing it right. I really wish she wrote patterns for Simplicity and McCall. A nice plus for me was that I ordered it, went to take my shower, and by the time I came back to the computer she had already emailed my pattern to download. If you don't want to sew one, she makes some super cute ones for her shop.
Dont you love this fabric? Remember my Iron post, where I had my fabric laying out underneath it? Yep this is what I did with it! I got it at Hobby Lobby. If you are wondering why its so shiny, that is because I used a really awesome thing called iron on vinyl. It's just what its called. Basically turns your fabric into a type of oilcloth. Super easy to apply, and I hope it will help keep it stain free. You can sew right through it too. I got mine at Hobby Lobby on the notions wall.
The other side of the envelopes has 3 more card pockets and one big pocket. If I carried around a checkbook it would fit nicely in one of the big pockets. You cant see it here, but there is also a zipper pocket . I hate doing zippers, but the instructions made it so easy to do, and I have never had a zipper look as well as this one did.
Guess that's it! Check out her great shop, and someone please tell me the proper pronunciation for Etsy!
Linking up with:
Monday, March 28, 2011
Drink Identification Signs
I recently helped pour rows and rows of drinks at a church function. We had sweet tea (as all good southerners should), unsweet tea, and water. Well the water was obviously water, but I must have said this is un-sweet tea several hundred times that night. That got old really quick, even though I tried to make it fun and say the water was vodka, which didn't go over so well with some people. So, while I made jokes and got dirty looks for daring to say un-sweet tea, I did some mental crafting. I decided that if I ever volunteered to pour drinks again I wouldnt have to say a word if I didnt want to. Well... thats not true. From my experiences most people are pretty lazy and dont read signs. Anywho. Here is what I came up with.
I think I may get some cute little 3x5 or wallet size frames and make one or two little ones for myself. I would use it for potlucks so I can write the name of the food on the glass. Another idea would be reusable place card holders. Hmmmm loving this!


I got these 5x7, easel back photo frames for $1.48 at Target a good while back. I knew I would never use them as is with the fuchsia, but knew I could paint them. So I paint them I did. I chose black because I figured it would be a good neutral color. We have lots of functions they can be used for.
I then added some leftover burlap from my Pegboard , which I secured with the fabulous Terrifically Tacky Tape ( or red line as some call it). I left the glass on so that they could use a dry erase marker and change it if needed. My other thought was to use my Cricut and cut the words out of black vinyl. I think I may get some cute little 3x5 or wallet size frames and make one or two little ones for myself. I would use it for potlucks so I can write the name of the food on the glass. Another idea would be reusable place card holders. Hmmmm loving this!
Linking up with:
Friday, March 25, 2011
Thursday, March 24, 2011
Non-toxic Lip Balm (and reusing lip balm tubes)
I thought it was time for another "recipe". Now this is not my recipe and I am sure you could find millions of other recipes out there. I had a few things I was looking for. So I did lots and lots of Google searches for a simple recipe that didnt have flavor (in my opinion it makes you lick your lips more and defeats the purpose of lipbalm), was non-toxic, used shea butter, and was simple to make. I finally found one that I liked at The Elliot Homestead. She has a great tutorial. I will share some things I did too.
Here is what you will need:
2 Tbsp. Coconut Oil
2 Tbsp. Beeswax
2 Tbsp. Shea Butter
Yield: about a dozen lip balm tubes
Tip: Beeswax is incredibly hard! I figured it would just chip off the bar easily. WRONG! I tried grating it, chipping it with an industrial like knife, freezing and grating again. Finally I got sick of the whole mess and I beat the tar out of it with a hammer. SCORE! If you do get the block of beeswax, use a hammer. I suggest buying the pastilles or granules instead. I will be doing so next time.
You can purchase your lip balm tubes all over the internet. I happened to have a lot of blistex around the house, and after learning some about the ingredients, I threw away the balm inside and cleaned them out (see Toxic Beauty for more info on why).
First, I put my beeswax in a glass measuring cup set in simmering water. There is that bamboo skewer I used.
The beeswax takes a good while to melt. Once this is melted add the shea butter and coconut oil. Only takes a minute or so to melt this. Then slowly pour it into your tubes. I have read that others use a medicine dropper to add the liquid to their tubes. I didn't have one.
I added up the cost and it ended up being about $0.29 a tube. It would cost more if I had bought the tubes though. Still, much cheaper than Burts Bees!
Today I was outdoors and it was chilly and windy. I was really wishing that I had put some of my homemade lip balm in my purse. My daughter and I both were suffering from chapped lips.:(
Tip: beeswax was still kicking my butt when it came to cleaning time. It really sticks to the utensils. I used the very hot soapy water from when I boiled the tubes and cleaned them by hand. The stuff I ran through the dishwasher didn't clean up so well.
Here is what you will need:
2 Tbsp. Coconut Oil
2 Tbsp. Beeswax
2 Tbsp. Shea Butter
Yield: about a dozen lip balm tubes
Tip: Beeswax is incredibly hard! I figured it would just chip off the bar easily. WRONG! I tried grating it, chipping it with an industrial like knife, freezing and grating again. Finally I got sick of the whole mess and I beat the tar out of it with a hammer. SCORE! If you do get the block of beeswax, use a hammer. I suggest buying the pastilles or granules instead. I will be doing so next time.
You can purchase your lip balm tubes all over the internet. I happened to have a lot of blistex around the house, and after learning some about the ingredients, I threw away the balm inside and cleaned them out (see Toxic Beauty for more info on why).
I peeled the labels off and gently boiled them in water with some dishsoap. I was a little scared they would melt, but they held up well. You could also use little glass pots or tins. I prefer not to dip my finger in something I am putting on my lips. Its gross to me. Especially if I am out and about and don't have a way to clean my hands. Those DCT pots you see below I use at home (with clean hands).
Once cleaned and dry I put those small, clear, plastic thingys that actually hold the balm and move it up and down, back in the tubes. I had to push them down a bit with a stick, actually it was a bamboo skewer, and turn the base to lower them all the way back to the bottom.
You can also purchase little trays that make filling the tubes easy and less messy. I didnt.
I was scared my tubes would tip over and I would have a nice waxy mess all over my counters so I came up with my own little idea. Rubber band, little box, yay!
First, I put my beeswax in a glass measuring cup set in simmering water. There is that bamboo skewer I used.
The beeswax takes a good while to melt. Once this is melted add the shea butter and coconut oil. Only takes a minute or so to melt this. Then slowly pour it into your tubes. I have read that others use a medicine dropper to add the liquid to their tubes. I didn't have one.
For $4.36 I made all of these
Thats really it. Super easy and quick. Most of my time was spent chipping away at that dang beeswax.I added up the cost and it ended up being about $0.29 a tube. It would cost more if I had bought the tubes though. Still, much cheaper than Burts Bees!
Today I was outdoors and it was chilly and windy. I was really wishing that I had put some of my homemade lip balm in my purse. My daughter and I both were suffering from chapped lips.:(
Tip: beeswax was still kicking my butt when it came to cleaning time. It really sticks to the utensils. I used the very hot soapy water from when I boiled the tubes and cleaned them by hand. The stuff I ran through the dishwasher didn't clean up so well.
Monday, March 21, 2011
Privacy Window Film
I have had the hardest time trying to cover this big square window in my bathroom with something that I like.
When I got to Lowes I changed my mind again. I found some 24 hour privacy film that is removable, but good enough to be permanent if we want. Plus it cost less and was a bigger size to fit my window without piecing it together. I decided that with this I could just do away with the shade and save money. I would just make a valance out of some fabric I already had. Here are the (poor picture quality) results. This is a night shot.
This is looking in from outside at night. The darker shape is my son standing next to the tub that is under the window. The light to the right is from the closet light with the door open.
I made a new valance for my shower too.
The bathroom is much brighter now. The first morning I walked into the bathroom with the privacy film up, I had to back up and shut the door. It was SO bright in there!
I hate this 8-9 foot mirror. It mocks me every time I step out of the shower. Stupid mirror!
I had a piece left over so I did the outside door to my garage.
The film was purchased at Lowes. It was about $19 for a big, 4foot wide by 6.5 feet long roll. It requires a spray solution for the installation process. Instead of paying $9 more for the kit, I used a spray bottle with water and a small bit (tsp) or so of liquid castile soap mixed in it. You could use baby shampoo which the manufacturers suggest. It was pretty easy to install. I suggest having some help though.
I am really enjoying the bright airy feeling of the bathroom now. Only thing I don't like is you can see all the dirt that I thought I had been cleaning up before, but obviously hadn't.
This was my most recent window covering. A heavy brown fabric that I added some fabulous fabric to the bottom of. I still hated the curtains. It was very dark in there, and I like the light, but being a bathroom and going in and out several times a day, we needed some privacy too. So keeping them open was not an option. I had thought of putting a Roman shade in there and told my husband so. He suggested frosting the window too so they could stay open.
I agreed that was a great idea, so I did some research and decided that etching it was not good, because this is not our forever house and etching being permanent, the next owners might not be so happy with it.
I had decided to get that mirrored film (mirror look on the outside) and make some Roman shades. That film is only good during the day when the sun is shining.When I got to Lowes I changed my mind again. I found some 24 hour privacy film that is removable, but good enough to be permanent if we want. Plus it cost less and was a bigger size to fit my window without piecing it together. I decided that with this I could just do away with the shade and save money. I would just make a valance out of some fabric I already had. Here are the (poor picture quality) results. This is a night shot.
This is looking in from outside at night. The darker shape is my son standing next to the tub that is under the window. The light to the right is from the closet light with the door open.
This is his shadow leaning in next to the window. Since I never get naked that close to the tub I am not scared... not scared anyways. Anybody seeing this silhouette would not try looking again.
And here it is from the inside during the day. I just made a simple valance with one inverted box pleat in the middle. I had used this fabric before, so it already had 3 of the 4 hems in place (sweet!).
And here it is with the flash on. The "stained glass" hanging in the window is a real piece of glass, but it is one of those Galary Glass, paint things. The tealight lantern hanging from the ceiling was $5 at T.J. Max. Not sure if it will stay. I made a new valance for my shower too.
The bathroom is much brighter now. The first morning I walked into the bathroom with the privacy film up, I had to back up and shut the door. It was SO bright in there!
I hate this 8-9 foot mirror. It mocks me every time I step out of the shower. Stupid mirror!
I had a piece left over so I did the outside door to my garage.
The film was purchased at Lowes. It was about $19 for a big, 4foot wide by 6.5 feet long roll. It requires a spray solution for the installation process. Instead of paying $9 more for the kit, I used a spray bottle with water and a small bit (tsp) or so of liquid castile soap mixed in it. You could use baby shampoo which the manufacturers suggest. It was pretty easy to install. I suggest having some help though.
I am really enjoying the bright airy feeling of the bathroom now. Only thing I don't like is you can see all the dirt that I thought I had been cleaning up before, but obviously hadn't.
Saturday, March 19, 2011
Card Game Tins
This project was inspired by my kids. They often come to me for help because the lid to their card game box won't shut, or they cant get the instructions back in the box. The boxes get roughed up, torn, and sometimes the cards get bent by frustrated kids trying to make them fit.
One day when they asked for help I had a great idea. Why not use some of those tea tins that I have been saving.
Yes, I love Earl Grey Tea. Loose leaf. So much better than that powder mess in a tea bag. I drink a cup every night before bed with a couple Biscoff cookies. Its how I unwind, and no it doesn't keep me awake all night.
So obviously I have a lot of tins and I just can't throw them away. They are very useful.
My first idea was to Mod Podge (oh how I love thee) some paper onto it, and then cut the box up and MP that on as well. Here is my result.
The cards fit nicely inside. I had to fold the instructions and the kids weren't so sure that I should be doing that. I had to reassure them that it was fine. I would have Mod Podged the instructions to the tin, but it was double sided. So there is an idea for simple single sided game instruction sheets.
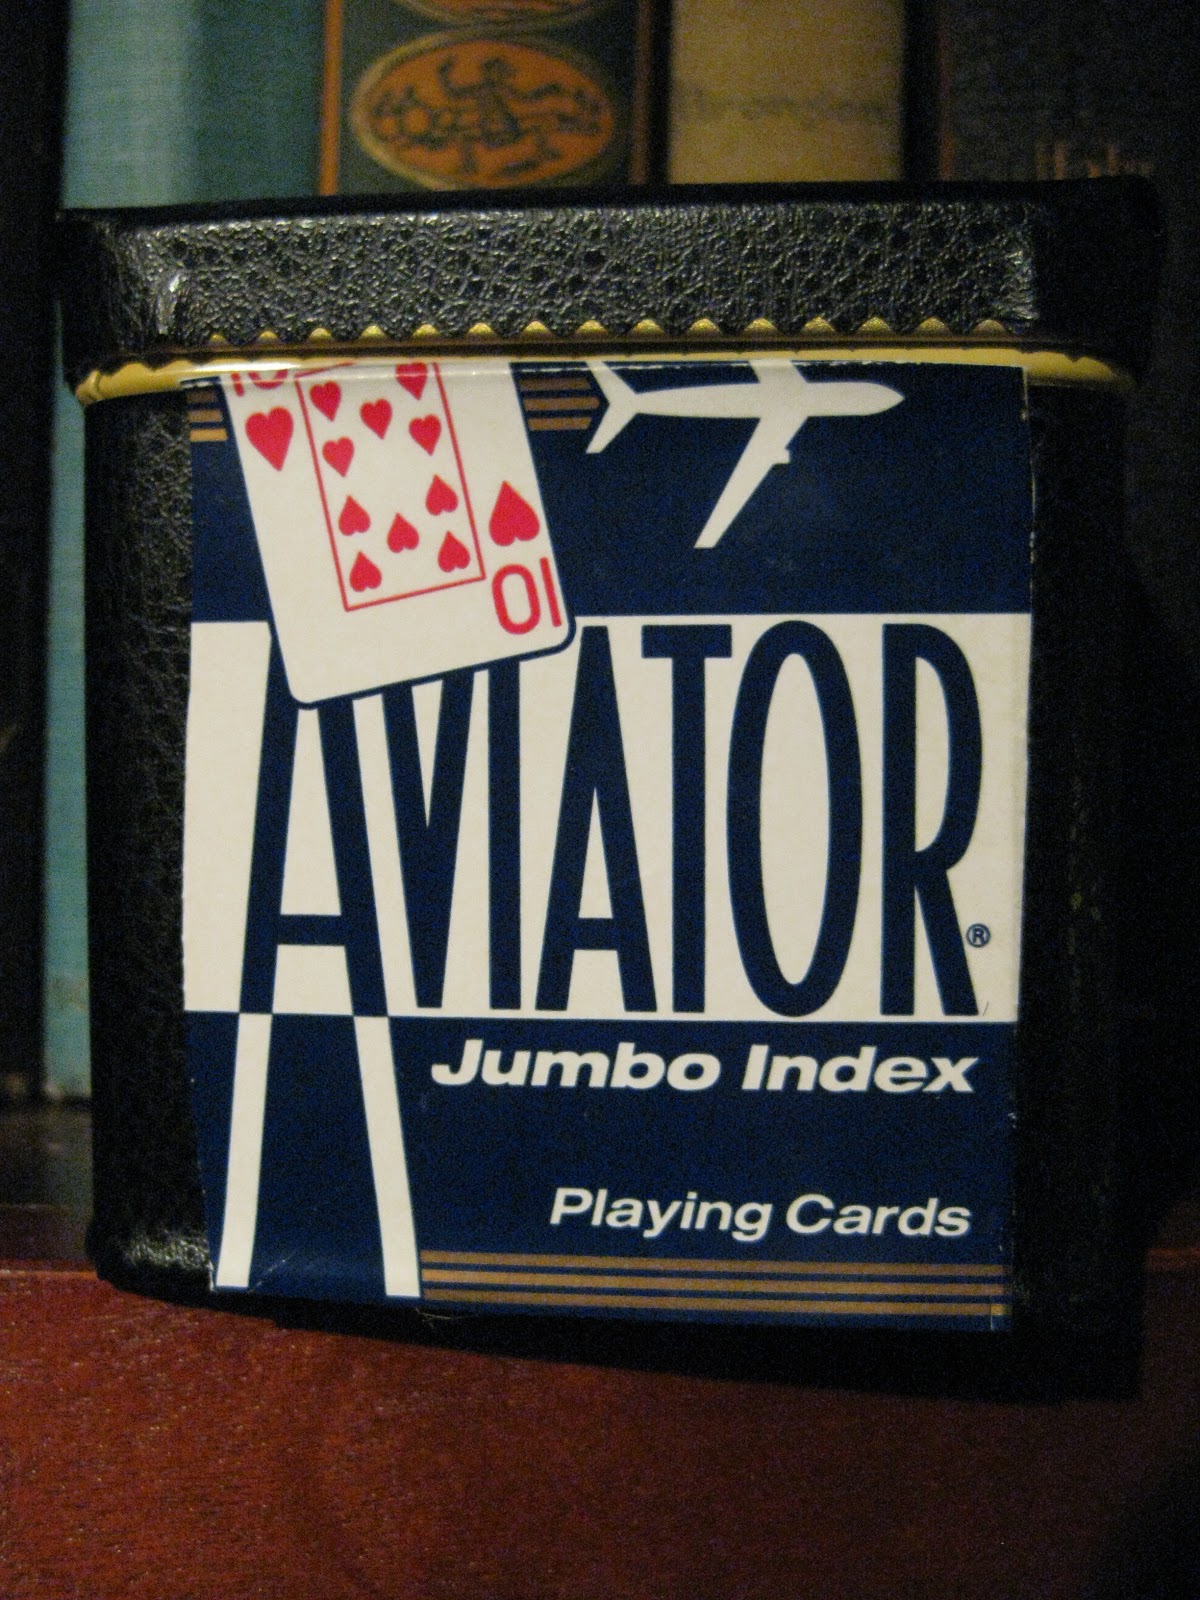
After making the first one I thought, this is ridiculous, why am I doing all of this cutting and measuring when I can just spray paint it! So I spray painted 2 more in white then MP-ed the box parts on. (oops I dont have a pic of that) Later on that night, while I was falling asleep, I thought of an even easier idea. Contact Paper it! Well I ran out of card game boxes so I used an old deck of cards. This was by far the simplest method yet and it only took a few minutes. In fact I forgot about it until just now and I made it while the pics were uploading.The Contact Paper I used on this one was a "leather" look one. Nice stuff. I then used some Terrifically Tacky Tape to secure the piece I cut from the box. I still think Mod Podge would be a great idea for the box parts. That would protect it and keep it from getting roughed up more.
Here are the 2 spray painted tins and the 1 paper covered tin in a clear, over the door, shoe holder. A wonderful idea I had to put all the small games in it. (though looking around on others blogs I realize I am not as smart as I sometimes think I am because they had the same idea) Keeps things tidy in the game closet.
Linking up to these great blogs. Check them out!
Subscribe to:
Posts (Atom)