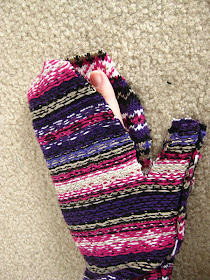
The Martha Stewart one tells you to wash the wool to felt it. Mine is cotton so that won't happen, which is fine with me. I decided to use the sleeves to make my mittens. and to make them long to keep my wrists warm.
First I cut off the sleeve to a length an inch or so longer than I wanted the mitten.
Then I cut out a mitten shape . I put my hand in the sleeve and cut around my fingers and thumb leaving about a half inch or so for a seam.
Sadly I didn't take many pictures of the mitten making process. I was in a hurry to make them and leave the house. I did a little more cutting and sewing around the wrist on the thumb side to make it more fitted. Sorry.. this tutorial stinks, but you get the idea.
Here they are done.
Pretty cool huh?
This next one you can see where I shaped the thumb side wrist part. It feels more snug now.
That done I decided that I would try to make a hat with the bottom edge of the sweater. I cut off a chunk from the bottom and used my husbands hat as a guide for cutting it out.
As with the mittens I just serged around the raw edges, wrong sides together. I also sewed a ... I guess its a dart in the top. Like the store bought one in the picture above has. Here is what it looks like from the inside. It just gives it a more rounded appearance.
The "darts" are the bumps at the top and bottom and the left and right are the seams from where I sewed the 2 halves together. Does that make sense to anyone but me?
I made a pom-pom for the top and here is the finished hat.
I have a huge head for a girl so I don't think it looks all that grand on me, but its a pretty cute hat.
The sweater I bought was a ladies small and here is all the sweater I have left.
You could make hats and mittens for the whole family with a giant mans sweater! ... And a wreath and pillows!
Yay for upcycling!


I love it! I really want to try it. Thanks for a great idea.
ReplyDeleteLove that Idea! I am a happy rookie when It comes to sewing but I belive I can manage this actually! Thanks for This! Love Lotta
ReplyDelete